The Technique for Beer Can Chicken: The Ultimate Backyard BBQ Recipe
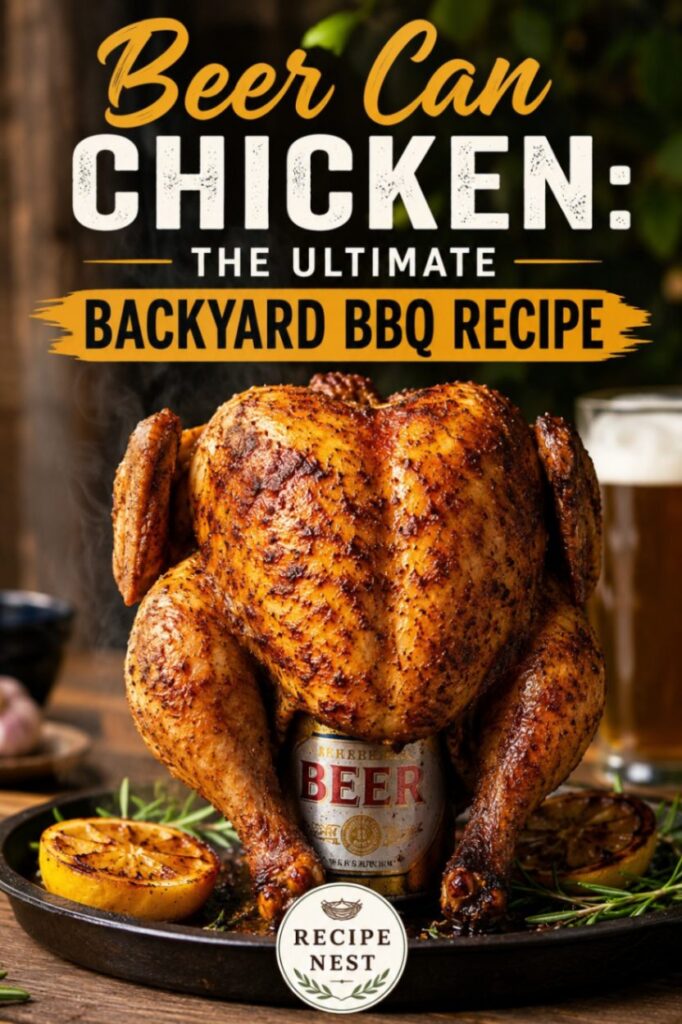
There is nothing quite like the aroma of a whole bird roasting over open grates on a lazy Saturday afternoon. Getting that perfect balance of crispy, golden skin and incredibly juicy meat can be a challenge on a standard grill, but mastering beer can chicken solves that problem completely. By propping the bird upright over an open half-full can, you create a self-basting chimney effect that locks in moisture while the outside gets beautifully browned.
I have fired up my grill for this specific meal more times than I can count, experimenting with different rubs, wood chips, and beverages. Through years of trial and error in my own backyard, I have dialed in the exact steps needed to prevent tipping, avoid rubbery skin, and guarantee a deeply seasoned bird every single time. Grab a cold drink, fire up your coals, and let us break down exactly how to pull off this backyard classic.
Why You’ll Love This Recipe
Since the modern backyard inception of this grilling technique in 1993, home cooks have turned to this method for one simple reason: it keeps the white meat from drying out before the dark meat finishes cooking. When you roast a chicken flat on a grate, the breasts are exposed to direct heat and often dry out long before the thighs reach their safe temperature. Standing the bird upright ensures even heat distribution all the way around.
-
Unmatched Moisture: The liquid inside the can gently simmers as the grill heats up, sending warm, humid air up through the cavity of the bird to keep the breast meat tender.
-
Uniformly Crispy Skin: Because the bird stands completely upright, every square inch of the skin gets exposed to the circulating convection heat of your grill, leaving no soggy spots behind.
-
Frees Up Grill Space: The vertical profile means you have plenty of room left over on the grates to grill up some corn on the cob, smoked beans, or fresh summer vegetables right alongside your main course.
Ingredients
You do not need an endless list of specialty items to make a spectacular meal. The secret lies in choosing quality components and prepping them correctly.
-
Whole Chicken (4 to 5 pounds): Look for a bird with intact, plump skin and no tears. Avoid massive birds over six pounds, as they take too long to cook through on the grill, increasing the risk of burning the exterior rub.
-
The Beer (12-ounce can): A standard lager, blonde ale, or pilsner works best. Avoid heavily hopped IPAs, which turn incredibly bitter when heated, and dark stouts, which can overpower the natural taste of the poultry.
-
Cooking Oil or Melted Butter (2 tablespoons): This acts as our binder for the spice rub and helps conduct heat to crisp up the skin. Olive oil, canola oil, or avocado oil all work beautifully.
-
Brown Sugar (2 tablespoons): Provides a touch of sweetness and helps the exterior caramelize into a beautiful mahogany crust.
-
Smoked Paprika (1 tablespoon): Gives the crust its iconic deep red color and adds a subtle backyard smokiness before the bird even hits the grill.
-
Garlic Powder & Onion Powder (1 tablespoon each): These savory staples build a solid flavor baseline that pairs perfectly with the poultry.
-
Kosher Salt (1 tablespoon): Crucial for drawing out moisture from the skin to help it crisp, while deeply seasoning the meat underneath.
-
Black Pepper (1 teaspoon): Freshly cracked coarse black pepper adds just enough bite to balance out the sweetness of the brown sugar.
-
Cayenne Pepper (1/2 teaspoon): Just a pinch for a tiny kick of heat, though you can easily omit this if you are cooking for sensitive palates.
Ingredient Substitutions
-
The Liquid Base: If you do not drink alcohol or simply do not have any on hand, a half-full can of root beer, cola, or ginger ale works wonderfully. The sugars in soda add a lovely depth to the meat. Apple cider or chicken stock poured into an empty, clean aluminum beverage can also does the trick.
-
The Binder: If you want an extra layer of tang, use regular yellow mustard instead of oil to bind the rub to the bird. Don’t worry—the strong mustard taste completely disappears during the cooking process, leaving behind a fantastic crust.
-
The Spice Palette: Feel free to swap the homemade rub for your favorite store-bought BBQ seasoning blend. Just check the salt content first; if the commercial rub is heavy on salt, skip the extra kosher salt listed in the ingredient checklist.
Equipment Needed
-
A Reliable Grill: A charcoal kettle grill or a multi-burner gas grill both work perfectly. You just need enough vertical clearance for a standing bird to sit comfortably without touching the inside of the grill lid.
-
Long Grilling Tongs: Crucial for safely lifting the hot bird off the grates when it is finished cooking.
-
Instant-Read Meat Thermometer: The absolute most important tool in your arsenal. Guessing by eye or by time is the fastest way to serve dry or undercooked meat.
-
A Rimmed Baking Sheet: For prepping the bird indoors and transporting it out to the cooking area without making a mess.
Step-by-Step Instructions
1. Prep the Bird
Remove the chicken from its packaging and take out the giblets or neck from the cavities if they are included. Pat the entire exterior of the bird completely dry with paper towels. Do not skip this part—any surface moisture left on the skin will create steam, which results in rubbery, chewy skin instead of a satisfying crunch.
2. Mix and Apply the Rub
In a small bowl, thoroughly combine the brown sugar, smoked paprika, garlic powder, onion powder, kosher salt, black pepper, and cayenne pepper. Rub the two tablespoons of oil all over the outside of the dry bird, making sure to get into the crevices around the wings and thighs. Rub the spice mixture generously over every inch of the skin, and toss a tablespoon of the rub directly into the internal cavity for extra depth from the inside out.
3. Prepare the Can
Crack open your can of choice and pour out (or drink!) about half of the liquid. You want the can to be roughly half-full so it does not top-heavy capsize on the grates, but you still need enough liquid to generate continuous steam. Pop two extra holes in the top of the can using a traditional church-key can opener; this allows the steam to escape much more freely into the interior of the bird.
4. Mount the Chicken
Carefully lower the internal cavity of the bird down over the open can. The legs should extend forward slightly, creating a stable, tripod-like stance with the base of the can acting as the third leg. Ensure the setup feels balanced on your baking sheet before you walk it out to the cooking area.
5. Fire Up the Grill
Set up your cooking surface for indirect heating, aiming for a consistent ambient temperature between 325°F and 350°F.
-
For Charcoal: Move your lit coals entirely to two opposite sides of the kettle, leaving a completely empty space right in the center. Place a small disposable drip pan in that middle space to catch the rendering fat.
-
For Gas: Turn on your outer burners and leave the middle burners completely turned off.
6. The Cooking Process
Place the tripod-perched bird directly onto the cool zone of the grates (right over your drip pan or unlit burners). Position the chicken so the legs face away from the direct heat source to prevent the thinner breast meat from cooking too rapidly. Close the lid immediately. Maintain your temperature steadiness and resist the urge to peek every ten minutes; opening the lid lets all the trapped heat escape, adding significant time to your cook. Let it roast undisturbed for roughly 1 hour and 15 minutes to 1 hour and 30 minutes.
Grill Setup (Top View)
+-----------------------+
|  🔥 DIRECT HEAT       | <-- Coals or Lit Burners
|                       |
|     NO DIRECT HEAT    | <-- Place Chicken Tripod Here
|     (Drip Pan Below)  |
|                       |
|  🔥 DIRECT HEAT       | <-- Coals or Lit Burners
+-----------------------+
7. Check the Temp
Slide your instant-read thermometer probe into the thickest part of the thigh, making absolutely sure you do not hit the metal can or a bone, which will throw off your numbers. The thigh should register 170°F to 175°F, and the thickest part of the breast should read 165°F. The juices should run completely clear.
8. Rest and Carve
Using sturdy tongs clamped around the neck or shoulders and a wide spatula under the base of the can, carefully transfer the entire structure to a clean cutting board. Let the bird rest upright exactly like this for 10 to 15 minutes. This resting window allows the interior juices to redistribute back through the meat instead of rushing out onto your board. Carefully lift the bird off the hot can using your tongs—be mindful, as the metal and the remaining liquid inside will still be incredibly hot. Carve into pieces and serve immediately.
Expert Tips
-
Tuck the Wings: Fold the tips of the wings back behind the bird’s shoulders before putting it on the heat. This prevents the thin tips from burning to a crisp during the long cook time and keeps the profile neat.
-
Wood Chip Additions: If you love a classic smoke flavor, toss a handful of apple wood or pecan wood chunks directly onto your hot coals right as the chicken goes on. Poultry absorbs smoke very quickly, and sweet woods pair beautifully with the sugar in the rub.
-
The Foil Trick: If you notice the top of the breasts or the wing tips getting too dark halfway through the cook, loosely tent a small piece of aluminum foil over the top of the bird to shield it from direct radiant heat.
Common Mistakes to Avoid
-
Placing the Bird Directly Over the Flames: Putting the chicken over a direct flame will scorch the sweet rub within fifteen minutes, leaving you with a burnt exterior and raw interior. Indirect heat is non-negotiable here.
-
Using a Full Beverage Can: A full can doesn’t leave enough room for the liquid to boil and generate steam effectively, and it makes the entire setup top-heavy, increasing the chances of the whole thing crashing down onto your grates.
-
Skipping the Resting Period: If you cut into the bird the second it comes off the heat, you lose all the internal moisture that the steaming process worked so hard to preserve. Give it at least ten minutes to settle.
Storage
If you happen to have any leftovers, allow the meat to cool down completely to room temperature. Pull the remaining meat away from the bones and store it in an airtight glass container in the refrigerator for up to three to four days. The leftover shredded meat is fantastic for weekday chicken salad, quick tacos, or a hearty midday sandwich.
You can also freeze the pulled meat in a heavy-duty freezer bag for up to two months. Just make sure to press out all the excess air from the bag before sealing to prevent freezer burn.
Reheating
To keep the meat from drying out during the reheating process, place your leftovers in a shallow baking dish and splash a few tablespoons of chicken broth or water over the top. Cover the entire dish tightly with aluminum foil to trap the moisture. Pop it into a preheated oven at 325°F for roughly 15 minutes, or until the meat is warmed completely through.
Nutrition Information (Estimated)
Servings: 6
| Nutrient | Amount Per Serving |
| Calories | 340 kcal |
| Total Fat | 19g |
| Saturated Fat | 5g |
| Cholesterol | 115mg |
| Sodium | 620mg |
| Total Carbohydrates | 4g |
| Protein | 36g |
Note: Nutritional values are approximations based on standard four-pound whole birds and include the skin and oil used during preparation. Actual values may vary depending on the specific brand of ingredients used.
Leave a Reply