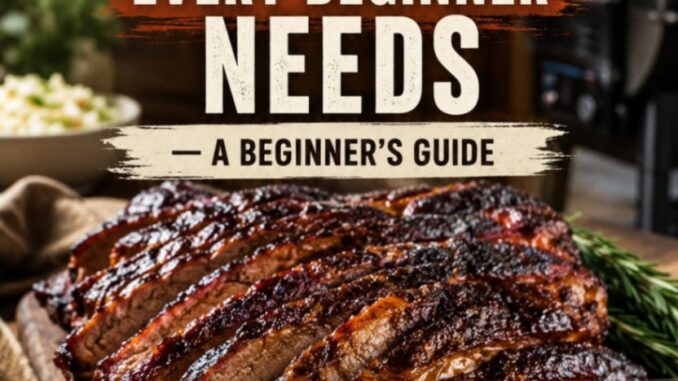
Pellet Grill Tips Every Beginner Needs — A Beginner’s Guide
There is a moment almost every new pellet grill owner experiences. You have unpacked the shiny new appliance, rolled it onto the patio, filled the hopper with fresh wood pellets, and dialed in your target temperature. It feels almost too easy. Unlike traditional offset smokers that demand constant wood feeding and airflow adjustments, or charcoal kettle grills that require careful coal arrangement, a pellet grill seems to offer set-it-and-forget-it magic.
At Recipe Nest (established in 2026 to help home cooks master every corner of their kitchen and backyard), we hear from hundreds of first-time grillers every season. The most common sentiment? A mix of excitement and mild confusion. While pellet grills—often referred to as pellet smokers—are remarkably user-friendly, they operate differently than standard gas or charcoal setups. They are essentially outdoor convection ovens powered by compressed wood, which means they come with their own unique mechanics, quirks, and best practices.
Whether you just unboxed your first model or you are trying to troubleshoot your early cooks, this guide walks through the essential pellet grill tips every beginner needs to cook with confidence from day one.
1. Understand How Your Pellet Grill Actually Works
Before throwing your first rack of ribs or brisket onto the grates, it helps to take a quick peek under the hood. Understanding the mechanics prevents costly user errors down the line.
A pellet grill relies on four main components:
-
The Hopper: The side-mounted box where you store dry food-grade wood pellets.
-
The Auger: An electric motor-driven corkscrew mechanism that feeds pellets from the hopper into the burn pot.
-
The Fire Pot & Igniter: Located at the bottom center of the cook chamber, where an electric heating element (rod) ignites the incoming pellets while a small fan feeds air to sustain combustion.
-
The Digital Controller: The brain of the machine. It reads internal heat via an RTD sensor and adjusts the auger speed to feed more or fewer pellets as needed.
Because heat is distributed via fan-driven convection airflow around a heavy metal heat deflector plate, pellet grills cook remarkably evenly. Flare-ups are rare because grease flows down a slanted drip tray into an external bucket rather than hitting open flames.
2. Pellet Selection: Fuel Matters More Than You Think
Your grill is only as good as the pellets you put into it. As a beginner, navigating the pellet aisle can feel overwhelming with dozens of brands, wood types, and blends available.
Always Use Food-Grade Hardwood Pellets
Never, under any circumstances, use heating pellets designed for home pellet stoves. Heating pellets can contain softwoods like pine, industrial binders, oils, or chemicals that produce toxic smoke and ruin food. Only purchase pellets explicitly labeled 100% Food-Grade Hardwood BBQ Pellets.
Learn the Wood Profiles
Different woods produce varying levels of smoke intensity:
-
Mild & Sweet Woods (Apple, Cherry, Maple, Pecan): Excellent for poultry, pork, fish, and baked goods. Cherry also imparts a beautiful mahogany color to meats.
-
Bold & Strong Woods (Hickory, Mesquite, Oak): Ideal for beef brisket, tri-tip, pork shoulder, and game meats. Oak is a great neutral burning wood that produces steady heat.
-
Competition Blends: Most major pellet manufacturers offer a signature blend (usually a combination of Hickory, Maple, and Cherry). If you are unsure where to start, a competition blend is versatile enough for almost any dish.
Keep Your Pellets Dry
Wood pellets are made of compressed sawdust. Moisture is their absolute worst enemy. If pellets absorb humidity or water, they swell, soften, and crumble into mush. Softened pellets will jam your auger, causing mechanical failures or firepot flameouts.
-
Store unused pellets in air-tight plastic buckets or sealed storage totes with a gasket lid.
-
If your grill sits outside unmounted for weeks in humid or rainy conditions, avoid leaving a full hopper of pellets exposed.
3. Master the Startup and Shutdown Procedures
If you treat a pellet grill like a standard gas burner—turning knobs on high with the lid closed—you risk damaging your unit or causing small backfires in the chamber.
The Startup Routine
-
Open the Lid First: Always open the cook chamber lid before turning on the power switch. During ignition, the electric rod heats up and pellets produce a thick, dense burst of white smoke. Keeping the lid open allows these initial combustion gases to vent safely.
-
Wait for the Flame: Listen for the roar of the fan and look for the thick smoke to thin out into a pale blue haze. Once you hear the rumble of flame and see the smoke clear (usually 3 to 5 minutes), close the lid.
-
Set Your Target Temperature: Once the lid is closed, set your desired cooking temperature and give the grill 10 to 15 minutes to preheat fully before adding food.
The Shutdown Routine
Never unplug your pellet grill while it is running or immediately after you finish cooking.
Always turn the dial to the “Shutdown” mode and let the machine run its automated cooling cycle. During shutdown, the auger stops feeding pellets, but the internal fan continues running for 10 to 15 minutes to burn off residual pellets inside the fire pot and cool the chamber down safely. Unplugging the grill prematurely can leave burning embers in the auger tube, causing burn-back into the hopper.
4. Maintenance: Ash Cleaning Is Non-Negotiable
Gas grills are forgiving when dirty; pellet grills are not. Every pound of wood pellets burned creates a small amount of fine ash. Over time, this ash settles in the fire pot, on the floor of the drum, and on internal sensors.
Clean the Fire Pot Regularly
Accumulated ash in the bottom of the fire pot smothers the igniter rod and restricts airflow. If air cannot circulate properly, your grill will struggle to reach temperature, display error codes, or blow out entirely during low-and-slow cooks.
-
Frequency: Vacuum out the fire pot every 2 to 3 long cooks (or roughly every 10 to 15 hours of burn time).
-
Tool: Use a dedicated shop vacuum or ash vacuum once the grill is completely cold. Never vacuum hot ash.
Protect Your Drip Tray
The slanted metal drip pan beneath the grates catches heavy grease drippings. To save hours of scrubbing:
-
Wrap the drip tray in heavy-duty aluminum foil before cooking.
-
When grease builds up, simply peel off the foil layer and apply a fresh sheet.
-
Check the grease chute and external grease bucket regularly to prevent grease fires.
5. Dialing In Smoke Flavor and Temperature Control
One surprise for many first-time pellet grill owners is that pellet grills do not produce heavy, billowing billows of white smoke throughout the entire cook. In fact, clean combustion produces thin, nearly invisible blue smoke.
The Low Heat / High Smoke Rule
Pellet grills generate significantly more smoke at lower temperatures:
-
180°F to 225°F: This is the sweet spot for maximum smoke production. Pellets smolder slowly, producing rich flavor.
-
275°F to 350°F: Pellets burn cleaner and faster. Smoke flavor is subtle and mild.
-
400°F and above: The grill functions almost strictly as a high-heat convection oven with minimal smoke flavor.
Pro Tip: If you want deep smoke flavor on large cuts like pork shoulders or beef briskets, start the first 2 hours of the cook at 180°F–200°F (or use your grill’s “Super Smoke” setting if equipped). Once the meat absorbs that initial wood flavor, raise the temperature to 250°F–275°F to finish cooking efficiently.
Using Smoke Tubes for Extra Punch
If you prefer a heavier smoke profile on shorter cooks (like chicken breasts or burgers), consider purchasing an inexpensive stainless steel pellet smoke tube. Fill the tube with pellets, light one end with a butane torch, and set it on the grates alongside your food for an added layer of wood smoke.
6. Temperature Management and Thermometers
While modern pellet grills feature digital controller displays, relying solely on built-in sensors can lead to overcooked or undercooked meals.
Calibrate Your Expectations Around Lid Displays
The temperature sensor mounted on the interior wall of your grill measures air temperature at that specific location—not necessarily where your meat is sitting on the grates. Hot spots exist on almost every grill model, typically near the edges of the drip plate or directly above the heat deflector.
Always Cook to Internal Temperature, Not Time
Recipes that give fixed cooking times (e.g., “cook pork shoulder for 6 hours”) are merely guidelines. Ambient outdoor temperature, wind, humidity, and individual cuts of meat heavily influence cook times.
-
Leave-In Dual Probes: Insert a leave-in meat probe into the thickest part of the protein (avoiding bone and heavy fat deposits) to track progress without opening the lid.
-
Instant-Read Thermometer: Keep a reliable digital instant-read thermometer near your station to verify internal temperatures across different sections of meat before pulling it off the heat.
Every time you lift the lid on a pellet grill, you release heat and air pressure, forcing the auger and fan to work harder to recover. Keep the lid closed whenever possible—if you’re lookin’, you ain’t cookin’!
7. Recommended Beginner Cuts for Your First Cook
To build confidence and get a quick win on your new grill, start with forgiving cuts of meat that benefit from low-and-slow heat and have a high margin for error.
| Cut | Target Internal Temp | Why It’s Great for Beginners |
| Bone-In Pork Shoulder (Pork Butt) | 203°F | High fat content makes it nearly impossible to dry out. Yields tender, delicious pulled pork. |
| Bone-In Chicken Thighs | 175°F–185°F | Richer and more forgiving than chicken breasts; absorbs wood flavor beautifully in 60–90 minutes. |
| Rack of St. Louis Ribs | ~200°F (or Bend Test) | The classic 3-2-1 rib method yields fall-off-the-bone results with simple steps. |
| Reverse-Seared Thick Ribeye | 130°F (Medium Rare) | Smoke low at 225°F until 115°F internal, then finish with a high-heat sear on a cast-iron skillet. |
Summary Checklist for Every Cook
Before lighting up your pellet grill, run through this quick memory checklist:
-
Check Pellet Level: Ensure the hopper has enough fresh pellets to last the duration of the cook.
-
Inspect the Fire Pot: Confirm ash isn’t overflowing from previous cooks.
-
Lid Open for Startup: Keep the lid open until the flame ignites and heavy white smoke clears.
-
Use Probes: Monitor internal meat temp rather than relying solely on the clock.
-
Run Full Shutdown: Always let the automated cooling fan finish before cutting power.
With these fundamentals locked down, you will skip the learning curve and jump straight to serving restaurant-quality wood-fired barbecue in your own backyard. Happy grilling from all of us at Recipe Nest!
Leave a Reply