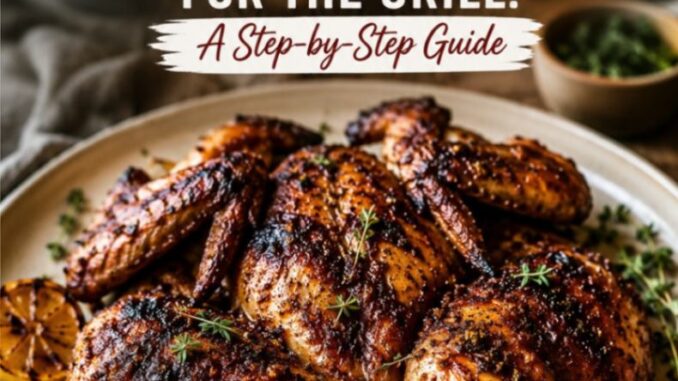
How to Spatchcock a Chicken for the Grill: A Step-by-Step Guide
If you have ever tried to grill a whole chicken the traditional way, you already know the frustration that usually follows.
You place a whole bird onto the grates, hoping for a beautiful, golden-brown masterpiece. Instead, you end up playing a constant game of damage control. By the time the thickest part of the breast finally reaches a safe internal temperature, the delicate skin is charred black, and the leg meat is dry and tough. Alternatively, you pull it off when the breast is juicy, only to discover raw, bloody meat near the thigh joint.
Whole poultry presents a fundamental geometric problem on the grill. A whole chicken is shaped like a hollow sphere. The breast meat sits high up near the top of the dome, while the legs and thighs wrap around the bottom. Because heat travels around curved surfaces unevenly, different parts of the bird cook at drastically different rates.
The solution to this age-old outdoor cooking dilemma isn’t a high-tech grill gadget or a complicated marinade. It is a classic butchery technique known as spatchcocking (also frequently called butterflying).
By removing the backbone and flattening the bird into a single, uniform plane, you instantly solve every single issue associated with grilling whole poultry.
Here is your definitive guide on how to spatchcock a chicken, why it works so well, and how to grill it to crisp, juicy perfection every single time.
Why You Should Spatchcock Every Whole Bird
Before picking up a pair of kitchen shears, it helps to understand why this method has become the preferred technique for professional chefs and backyard pitmasters alike.
1. Ultra-Even Cooking
When a chicken is flattened, the meat lies at an even height across the grill grates. The thighs and legs—which naturally contain more connective tissue and fat—sit on the outside where they can take higher heat, while the lean breast meat sits safely in the center. Every portion finishes cooking at virtually the exact same time.
2. Drastically Reduced Cook Time
A standard three-to-four-pound whole roasted or grilled chicken usually takes anywhere from 75 to 90 minutes. A spatchcocked chicken of the exact same size cooks in just 35 to 45 minutes on the grill. You cut your cooking time nearly in half without sacrificing quality.
3. Maximum Crisp Skin
Skin on a traditional whole chicken tucked underneath the bird turns soggy because trapped steam gets locked inside the cavity. When you spatchcock, every square inch of skin faces upward, exposed directly to heat and airflow. This allows the fat underneath the skin to render cleanly, resulting in shattering, bite-through crispiness.
4. Better Flavor Distribution
A whole chicken cavity is notoriously difficult to season properly. When flattened, you double the surface area available for rubs, marinades, herbs, and smoke exposure. You can season both the top and underside of the bird thoroughly.
Essential Equipment You Will Need
You do not need an advanced culinary setup to spatchcock a chicken, but having the right basic tools makes the process smooth, fast, and safe.
-
Heavy-Duty Kitchen Shears (Poultry Shears): This is the single most important tool. Standard household scissors will slip or fail when cutting through bone. Purpose-built poultry shears feature thick, notched blades designed specifically to snip through cartilage and rib bones effortlessly.
-
Large, Sturdy Cutting Board: Choose a wood or plastic board with a juice groove if possible, and place a damp paper towel underneath it so it won’t slide across your counter.
-
Paper Towels: Essential for drying the chicken thoroughly, which prevents slipping during cutting and guarantees crispier skin later.
-
Chef’s Knife: Optional, but useful for making a small scoring notch along the sternum or trimming excess skin.
-
Digital Instant-Read Meat Thermometer: Non-negotiable for grilling success. Cooking to precise internal temperatures ensures maximum juiciness and safety.
The Step-by-Step Spatchcocking Guide
Follow these simple steps to transform a whole chicken into a flat, grill-ready layout in under five minutes.
Step 1: Prep and Dry the Chicken
Remove the chicken from its packaging. Check inside the main cavity and neck cavity for any giblets, neck pieces, or plastic bags, and discard or set them aside for making stock.
Do not wash the chicken in your sink, as splashing water spreads foodborne bacteria around your kitchen. Instead, place the chicken on your cutting board and pat it completely dry inside and out using fresh paper towels. Moisture is the enemy of both clean cutting and crispy skin.
Step 2: Position the Bird Backbone-Up
Lay the chicken down on your cutting board so that the breast side is facing down against the board and the tail/backbone is facing up toward you. The drumsticks should be pointing down toward your body.
Step 3: Cut Along the Right Side of the Spine
Identify the backbone running right down the center of the bird from the tail to the neck opening. Take your poultry shears and insert the bottom blade just to the right of the tailbone at the base of the chicken.
Cut firmly straight up along the right side of the spine, snipping through the small rib bones as you go. Stay as close to the spine as possible to avoid losing usable meat. If you hit a tough spot, apply steady palm pressure on the shear handles rather than hacking violently.
Step 4: Cut Along the Left Side of the Spine
Once the right side is completely detached, turn the chicken around or re-adjust your grip. Insert the shears just to the left side of the backbone and cut straight down from top to bottom.
The backbone should now pop out completely in one solid strip. Save this backbone in a freezer bag for making chicken broth later, or discard it.
Step 5: Score the Breastbone (The Secret to an Easy Flatten)
Flip the chicken over so the breast side is now facing up, and open the bird like a book. Look at the center fold between the two breasts.
To help the chicken lie completely flat without force, take a sharp chef’s knife and make a light 1/2-inch vertical slit right in the center of the cartilage/sternum bone at the top of the cavity. You do not want to cut all the way through the breast meat; you are simply scoring the thick cartilage at the top joint.
Step 6: Press Firmly to Flatten
Place the palms of both hands flat over the center of the chicken breast, right over the breastbone. Stand tall over the cutting board and lean your weight forward, pressing down firmly until you hear a distinct crack or pop.
The breastbone will give way, and the chicken will immediately lay completely flat like a wide pancake. Tuck the wing tips behind the shoulder joints so they don’t burn over the fire. Your chicken is now officially spatchcocked.
Essential Guidelines for Grilling Spatchcocked Chicken
Now that your bird is prepped, executing the grill phase requires proper fire setup and temperature discipline. Follow these core guidelines to ensure success every time you light the grates.
Guideline 1: Always Use a Two-Zone Setup
Never grill a spatchcocked chicken over a direct, high fire for the entire cook. The dripping chicken fat will create uncontrollable flare-ups, coating your bird in soot and burning the skin long before the meat cooks through.
-
For Charcoal Grills: Bank all lit coals onto one half of the grill grate, leaving the other half completely empty.
-
For Gas Grills: Light two or three burners on one side to medium-high heat (375°F to 400°F ambient grill temp), leaving the remaining burners off.
Place the chicken skin-side up on the indirect heat side (the cool side) and close the grill lid. The heat will circulate around the flattened chicken like a convection oven, roasting it gently and rendering the fat safely without flare-ups.
Guideline 2: Dry-Brine for Unmatched Crispness
If time allows, season your spatchcocked chicken generously with kosher salt (about 1 teaspoon per pound) at least 4 to 12 hours before grilling. Place the salted bird uncovered on a wire rack set inside a rimmed baking sheet in the refrigerator.
This process, known as dry-brining, draws moisture out of the skin while allowing salt to penetrate deep into the meat fibers. The skin dries out thoroughly in the fridge, guaranteeing an incredibly golden, crackling crust on the grill.
Guideline 3: Mind the Sugar Content in Rubs and Sauces
Sugar caramelizes nicely at moderate temperatures, but it burns and turns bitter above 350°F. If you are using a spice rub with high sugar content (like brown sugar), keep your indirect grill temperature closer to 350°F.
If you plan to glaze your chicken with sweet barbecue sauce, brush it on only during the last 10 minutes of cooking on the indirect side. This gives the sauce time to tack up and set without charring into a black mess.
Guideline 4: Target Internal Temperatures, Not the Clock
Cooking time varies based on wind, ambient weather, and individual grill variations. Rely strictly on an instant-read thermometer inserted into the thickest parts of the meat (without touching bone) to judge doneness:
-
Breast Meat: Pull the chicken off the heat when the thickest part of the breast reaches 160°F to 165°F.
-
Thigh/Leg Meat: Thigh meat is rich in dark muscle tissue and tastes far better when cooked to 175°F to 185°F, which renders the tough connective tissues into juicy collagen.
Because the legs sit closer to the hotter edges of the indirect zone, they naturally cook faster than the breasts, allowing both cuts to hit their ideal doneness windows simultaneously.
Guideline 5: Finish with a Quick Skin-Side Sear
For an extra layer of flavor and color, finish the cook with a quick direct sear. Once the breast reaches about 155°F on the indirect side, use long tongs to flip the chicken skin-side down onto the direct heat side for 2 to 4 minutes.
Watch the grill constantly during this step. The rendering skin fat will hit the flames, creating brief flares. Move the bird around as needed to crisp the skin evenly, then pull it off the grill once the internal breast temp hits 165°F.
Guideline 6: Rest Before Carving
Resist the temptation to cut into the chicken immediately after taking it off the grill. Resting is mandatory.
Transfer the spatchcocked chicken to a clean cutting board or serving platter and let it sit undisturbed for 10 to 15 minutes. This gives the muscle fibers time to relax and reabsorb the hot juices. If you carve it too early, those flavorful juices will run out onto the board, leaving you with dry meat.
Simple Troubleshooting & Pro Tips
-
What if I don’t own poultry shears? While shears are safest, you can use a heavy chef’s knife. Place the chicken cavity-side down, slice along one side of the spine with a firm downward motion, then repeat on the other side. Exercise extra caution, as bones can cause the blade to slip.
-
Wing tips burning? Wing tips consist almost entirely of thin skin and bone. Always fold them back behind the main breast joint (like placing hands behind the head) before cooking. This keeps them secure and prevents them from sticking up toward the hot lid.
-
Carving made effortless: Carving a spatchcocked chicken is remarkably easy compared to a whole bird. Slice down through the joint connecting the thigh and breast to separate the quarter legs, sever the drumsticks from the thighs at the knee joint, and slice each breast half off the central bone horizontally.
Mastering the spatchcock technique eliminates all the stress of cooking whole poultry outdoors. Once you experience how fast, even, and foolproof this method is, you will never go back to traditional whole-roasting on the grill again. Light your fires, flatten your birds, and enjoy the best grilled chicken of your life.
Leave a Reply