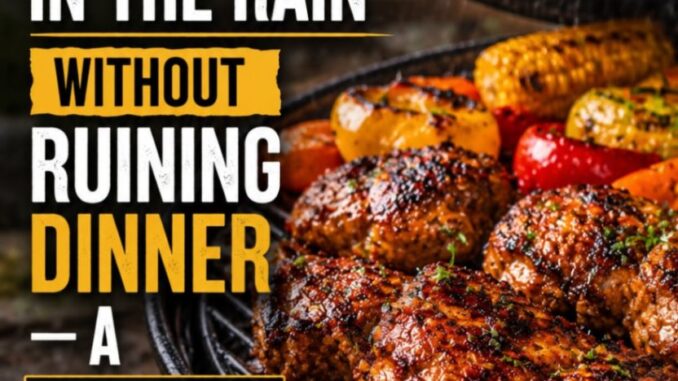
How to Grill in the Rain Without Ruining Dinner — A Beginner’s Guide
There is a distinct moment every outdoor cook knows by heart. You have spent the afternoon prepping your cuts of meat, setting up your seasonings, and getting your mind ready for a great meal hot off the grates. You step outside, carry your platter to the patio, and right as you light the burners or fire up the charcoal, you feel it: a cold heavy droplet right on the back of your neck. Within five minutes, the light drizzle turns into a steady downpour.
Your first instinct might be panic. You think about dragging the grates inside, or worse, giving up entirely and throwing a beautiful piece of meat into a skillet or ordering emergency pizza.
Do not order the pizza.
Grilling in the rain might seem like a disaster in the making, but it is actually one of the most useful skills a backyard chef can master. Weather is unpredictable, but thermal dynamics and food safety are not. Rain introduces three main hurdles: ambient temperature drops, high moisture, and wind. If you know how to handle those three factors, you can cook a fantastic meal outside even during a downpour.
This guide breaks down every guideline, safety rule, and practical technique you need to grill in wet weather with total confidence.
Guideline 1: Safety First — Know Where (and Where Not) to Grill
When the rain starts falling, the immediate temptation is to pull the grill under a roof or near an open structure. This is where most wet-weather grilling accidents happen, so establishing clear safety boundaries is your absolute first priority.
Never Move a Grill Indoors or into Enclosed Spaces
Never, under any circumstances, bring a gas, charcoal, or pellet grill inside your home, a garage with the door down, a storage shed, or a fully screened-in porch. Charcoal and gas grills produce carbon monoxide, an odorless, colorless gas that can reach lethal concentrations very quickly in unventilated areas. Furthermore, radiant heat and stray sparks in an enclosed space create an extreme fire hazard.
Finding Safe Overhead Cover
If you want shelter from the rain while cooking, keep these distance rules in mind:
-
Covered Patios and Overhangs: You can position your grill near the edge of an open patio overhang, provided there is at least nine to ten feet of vertical clearance above the grill lid and the sides are completely open to allow smoke and gas to dissipate.
-
Pop-Up Tents and Canopies: A standard pop-up canopy works well, but keep the grill near the outer edge rather than directly centered under the peak, especially if you are cooking over open charcoal flames that could produce flare-ups.
-
Large Patio Umbrellas: If using an umbrella, make sure it is secured firmly against wind gusts and elevated high enough that radiant heat from an open lid will not scorch the fabric.
Watch Your Footing and Clothing
Wet decks, slick concrete, and muddy grass make carrying hot food and handling hot tools dangerous. Wear sturdy, non-slip footwear. Avoid wearing loose rain ponchos with hanging drawstrings, as these can easily dangle over the heat source when you lean down to check your grates.
Guideline 2: Understand How Rain Affects Your Heat Source
Rain does not just make things wet; it aggressively pulls heat away from your grill through evaporation and ambient cooling. Humidity and wind combine to throw off your typical temperature control. Adjusting for your specific fuel type is critical.
Managing a Gas Grill in the Rain
Gas grills generally hold up well in mild to moderate rain because the burners provide a continuous flame. However, rain accompanied by wind can cause serious issues.
-
Watch for Burner Blowouts: Strong winds can blow out low-gas flames. Check your burner indicator tubes or flame viewports periodically to ensure you aren’t leaking gas into a extinguished chamber.
-
Account for Temperature Drops: The cold rain hitting the steel lid cools the cooking chamber rapidly. You will likely need to set your burner knobs one notch higher than you normally would to maintain your target internal temperature.
-
Keep Extra Propane Handy: Because your grill works harder to maintain heat, you will consume propane faster than on a dry day.
Managing a Charcoal Grill in the Rain
Charcoal presents a bigger challenge in the wet because damp fuel will not burn, and water falling directly into the kettle can extinguish your embers or create excess steam that ruins your crust.
-
Keep Your Fuel Bone-Dry: Store spare charcoal briquettes or lump charcoal indoors or in a sealed plastic bin until the second you need them. Wet charcoal will smolder, produce acrid smoke, and fail to reach cooking temperatures.
-
Shield Your Vents: Charcoal fires rely on bottom and top vents for airflow. If rain falls directly into top vents, it dampens the coals underneath. Tilt your grill lid slightly so the top vent faces away from the direction of incoming rain, or use a small metal foil shield rigged above the vent to deflect water while allowing smoke to escape.
-
Use More Coals: Start with roughly twenty to thirty percent more charcoal than you would on a dry day to compensate for the thermal energy lost to rain on the outer shell.
Guideline 3: Choose the Right Menu for Wet Conditions
A wet rainstorm is not the time to attempt a eight-hour smoked brisket or delicate, high-maintenance items that require constant monitoring. Success in the rain relies on speed, efficiency, and forgiving recipes.
Ideal Rainy-Day Foods
Focus on foods that cook quickly over direct or medium heat, allowing you to minimize your time standing outside in the weather:
-
Thin Cuts of Steak: Skirt steak, flank steak, or sirloin steaks cook in under ten minutes and benefit from high, quick heat.
-
Burgers and Sausages: High fat content keeps them juicy, and they cook fast with predictable timing.
-
Pork Chops and Chicken Cutlets: Boneless cuts cook rapidly and evenly without needing prolonged low-heat roasting.
-
Kebabs: Pre-skewered meat and vegetables cook in minutes and are easy to flip in batches.
Foods to Avoid
-
Large Bone-In Roasts: Whole chickens or pork roasts require opening the lid repeatedly to check progress over long periods, exposing the grill chamber to heat loss.
-
Sugary Glazes and Sauces: Basting requires keeping the lid open. If you want barbecue sauce on your food, apply it in the final two minutes of cooking or sauce the food indoors after pulling it off the grates.
-
Fragile Seafood: Thin fish fillets stick easily when temperature fluctuates and can tear if you are rushing to work between rain bursts.
Guideline 4: Essential Gear for Rainy Day Success
Having the right tools ready before you step out the door turns a stressful situation into an organized operation.
Remote and Instant-Read Thermometers
If there is one tool that saves rainy day grilling, it is a quality digital thermometer.
-
Leave-In Probe Thermometers: Dual-probe digital thermometers allow you to insert a sensor into the meat, run a heat-resistant wire out of the closed grill, and read the temperature on a wireless monitor inside your dry kitchen. This eliminates the need to open the lid just to check doneness.
-
Instant-Read Thermometers: If you must check manually, an instant-read probe gives you an accurate temperature within two seconds, keeping lid-open time to a absolute minimum.
Trays with Covers
When moving food from the kitchen to the grill, use a deep tray or rimmed baking sheet paired with a sheet of aluminum foil or a fitted lid. Rain falling on raw or partially cooked meat cools the surface instantly and dilutes your marinades or spice rubs.
High-Temp Gloves and Dry Towels
Keep several dry kitchen towels inside your rain jacket pocket or under cover. Wet oven mitts or cloth potholders transfer heat almost instantly through steam, creating a severe burn risk if you grab a hot grill handle with wet fabric. Use silicone or leather high-heat grilling gloves instead.
Guideline 5: The Step-by-Step Rainy Day Cooking Process
Executing a cookout in wet weather requires an assembly-line mindset. Preparation happens indoors; execution happens quickly outdoors.
       [INDOORS]              [OUTDOORS]              [INDOORS]
+--------------------+   +-------------------+   +--------------------+
| Full Mise en Place | --> | Rapid Preheating | --> | Resting & Serving  |
| Prep & Season Food |   | Minimal Lid Lifts |   | Clean & Dry Gear   |
+--------------------+   +-------------------+   +--------------------+
Step 1: Execute Full Indoor Mise en Place
Before you light a single match or open a gas valve, prepare everything inside your kitchen. Season your meat, trim your cuts, light-oil your vegetables, and place all your cooking utensils (tongs, spatula, thermometer, timer) onto a single transport tray. Cover the tray securely before stepping outside.
Step 2: Preheat Longer Than Usual
Cold grates and damp ambient air require extra preheating time. Allow your grill to run with the lid closed for at least fifteen to twenty minutes before adding food. The grates must store enough heat energy to sear the food immediately upon contact, overcoming the cooling effect of wet air.
Step 3: Practice the “Lid Closed” Rule
Every time you lift the grill lid in rainy weather, cold air rushes in, moisture collects on the inner dome, and cooking time increases by five to ten minutes.
-
Plan your cook so that you only open the lid twice: once to flip the food halfway through, and once to check the final internal temperature before removing it.
Step 4: Transport and Rest Indoors
When your meat reaches its target internal temperature (remembering to pull it roughly 5°F below final doneness to account for carryover cooking), transfer it immediately to a clean, covered platter. Carry it straight inside to rest. Do not let cooked meat sit outside on a cool side grate, as the rain and humidity will cool it down within seconds and ruin the crust.
Guideline 6: Post-Cook Care and Preventing Rust
Your job is not completely done when the food goes inside to rest. Moisture is the ultimate enemy of outdoor cooking equipment, leading to rust, mold growth, and damaged igniters if left unaddressed.
Burn Off Residual Grease
Immediately after removing your food, close the lid and let the burners run on high (or keep charcoal vents open) for five to ten minutes. This burns off food debris and fat drippings on the grates, preventing moisture from trapping organic matter that breeds mold.
Clean the Grates Promptly
Scrape the grates clean while they are still hot using a grill brush or wooden scraper. Once clean, apply a light coat of high-smoke-point cooking oil (such as canola or peanut oil) with a paper towel held in tongs. This creates a protective hydrophobic barrier over the metal grates that repels moisture.
Let the Grill Cool Completely Before Covering
Never throw a waterproof vinyl or canvas grill cover over a hot or warm grill. Heat trapped under a waterproof layer creates severe condensation, which pools on cold metal surfaces and causes rapid rust formation on hinges, burners, and flavorizer bars. Wait until the grill is entirely cool to the touch, wipe off any standing water from the exterior housing with a dry towel, and then put your protective cover on.
Turn Bad Weather Into Great Barbecue
Grilling in the rain does not require luck or professional equipment. It simply demands respect for the elements and a few adjustments to your technique. By securing safe shelter, keeping your lid closed, managing your thermal output, and utilizing digital temperature monitoring, you can cook incredible food regardless of what the clouds are doing overhead.
The next time the sky opens up mid-cookout, don’t head for the kitchen stove. Adjust your vents, grab your digital thermometer, keep your food dry, and enjoy the satisfaction of serving a perfectly seared meal right through the storm.
Leave a Reply