7 Ways to Make Grilled Tri-Tip Everyone Will Ask For the Recipe
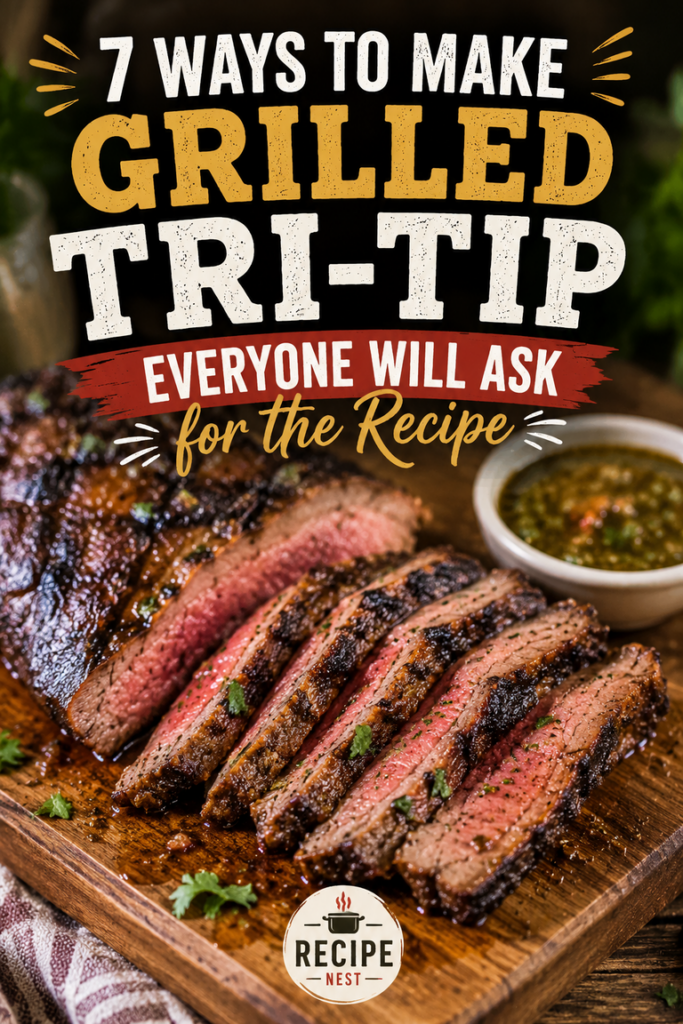
If you’ve ever hosted a backyard barbecue and wanted to serve a cut of beef that completely steals the show without draining your bank account, you’re looking for tri-tip. This bottom sirloin cut is a staple here in the West, shaped like a crescent or a triangle, and it boasts some of the most intense, rich beef flavor you can get from a grill. When it’s cooked right, it competes easily with expensive ribeyes, yielding tender, juicy slices that disappear from the platter in minutes.
Getting a perfectly grilled tri-tip onto your table isn’t difficult, but it does require moving past standard steak rules. Because of its uneven, tapered shape, this cut requires a specific strategy so the thin tip doesn’t turn into shoe leather while the thick center stays raw. Over the years, through trial, error, and plenty of smoky afternoons, these seven distinct methods and variations have proven themselves to keep neighbors lining up for seconds.
Why This Cut Belongs on Your Menu
Tri-tip occupies a unique sweet spot in the meat world. It offers the rich, deep beefiness of a brisket combined with the quick-cooking convenience of a thick steak. If you lean into its natural shapes and grains, you can easily feed a crowd of six to eight people with a single roast, making it incredibly economical for summer gatherings.
The magic of this cut lies in how it responds to different flavor profiles. Whether you prefer a crusty, peppery exterior or a sweet, sticky glaze, the meat absorbs seasonings beautifully. It handles high heat for a beautiful sear but thrives with indirect heat to gently render its internal fat.
The Essential Ingredients
A great meal starts at the butcher counter. Look for a tri-tip roast weighing between two and three pounds.
-
The Beef: Choose a roast with a good amount of white flecks of fat running through the meat—that’s marbling, and it equals moisture. I prefer buying it with the “fat cap” still attached on one side, trimmed down to about a quarter-inch thick.
-
Coarse Kosher Salt: Standard table salt is too fine and makes it easy to over-salt the meat. Coarse flakes create a better crust.
-
Coarse Black Pepper: Use a coarse grind (like 16-mesh) so it doesn’t dissolve into the meat and burn on the grates.
-
Garlic Powder: Adds a savory, aromatic base that pairs perfectly with beef.
-
High-Smoke-Point Oil: Avocado or canola oil helps the rub stick and prevents the meat from tearing when it hits the hot grates.
Easy Substitutions
If your local grocery store doesn’t stock tri-tip, ask the butcher for a whole top sirloin roast or a thick flank steak. Flank steak cooks much faster because it’s thinner, so you’ll need to pull it off the heat sooner. If you don’t want to mix your own dry rub, a high-quality store-bought Santa Maria style seasoning works beautifully. For the oil, avoid extra virgin olive oil for the high-heat searing phase; it burns at a low temperature and can leave a bitter taste on the crust.
Tools for the Job
You don’t need fancy gadgets, but a few specific tools make the process foolproof.
-
An Instant-Read Digital Thermometer: This is non-negotiable. Because tri-tip varies in thickness, you cannot accurately guess doneness by pressing on it or timing it.
-
Long Sturdy Tongs: You need a good grip to flip a heavy, slippery two-pound piece of meat without puncturing it and losing juices.
-
A Sharp Carving Knife: A dull blade will shred the fibers instead of cutting clean slices, which directly affects how tender the meat feels in your mouth.
7 Ways to Prepare and Cook Grilled Tri-Tip
1. The Classic Santa Maria Style
This is the granddaddy of all tri-tip recipes, originating in California’s Central Coast. The traditional rub uses equal parts kosher salt, coarse black pepper, and garlic powder.
Set up your grill for two-zone cooking. This means you have a hot side with direct heat and a cooler side with no coals or burners underneath. Sear the seasoned roast directly over the hot flame for about five minutes per side until a deep, beautiful brown crust forms. Then, slide the meat over to the cool side, close the lid, and let it roast gently at around 300°F (149°C) until the internal temperature reaches your target. This classic method delivers a pure, unadulterated beef flavor that pairs perfectly with pinot noir and garlic bread.
2. The Foolproof Reverse Sear
If you struggle with getting an even pink color from edge to edge, the reverse sear is your answer. Instead of searing first, you start the meat on the cool side of the grill. Let it gently warm up at 225°F (107°C) to 250°F (121°C).
As it cooks slowly, the exterior dries out slightly, which is exactly what you want. A dry surface creates the absolute best sear later on. Once the center hits 115°F (46°C), pull the meat off the grill, crank your burners or stoke your coals to maximum heat, and drop the roast right over the flames. Sear for two minutes per side. You get a perfectly uniform, tender interior with a shattering, crispy dark crust.
3. Red Wine and Rosemary Marinade
Marinating works wonders on tri-tip because the meat has a relatively open grain structure that drinks up liquids. Mix a cup of dry red wine (like a Cabernet or Merlot) with a quarter cup of soy sauce, a few smashed garlic cloves, and a handful of fresh rosemary sprigs.
Let the meat sit in this mixture in the refrigerator for at least four hours, or up to twelve. When you remove it, wipe off the excess moisture with a paper towel before it hits the grill. If the meat is too wet, it will steam instead of searing, missing out on that crucial flavor development. The acid in the wine helps tenderize the lean fibers, creating an incredibly juicy bite with an elegant, earthy aroma.
4. Coffee-Rubbed Charcoal Roast
Coffee adds an incredible depth of flavor and an appealing dark color to grilled beef. Mix two tablespoons of finely ground dark roast coffee with brown sugar, smoked paprika, chili powder, and salt.
The sugar caramelizes over the heat, while the bitterness of the coffee cuts through the rich fat of the beef. When using a rub with sugar, you must monitor your grill temperature carefully. Keep the meat on the indirect side of the grill for most of the cook, and only sear it briefly at the very end so the sugar doesn’t scorch and turn black.
5. Sweet Sommer Beer Bath
For a casual, crowd-pleasing option, submerge the roast in a mixture of a classic American lager, Worcestershire sauce, a splash of apple cider vinegar, and sliced onions.
Let it marinate overnight. The enzymes in the beer break down the tougher exterior tissues. Cook this version using the two-zone method. The natural sugars from the malt in the beer create a gorgeous mahogany color on the surface as it roasts, resulting in a sweet, savory profile that screams backyard summer party.
6. Wood-Smoked Kettle Style
If you use a charcoal kettle grill, you can turn your tri-tip into a mini-brisket style feast. Add one or two small chunks of red oak or hickory wood directly onto your hot coals.
Place the seasoned meat on the indirect side of the grate and close the lid, keeping the vents partially closed to hold a steady 250°F (121°C). The meat will absorb the rich wood smoke for about 45 minutes to an hour. Once it reaches 130°F (54°C) for medium-rare, pull it off. The distinct smoke ring and deep woody aroma mimic the flavors of a true Texas smokehouse.
7. Garlic Butter Basted Finish
This method brings steakhouse luxury to your outdoor grill. Season the meat simply with salt and pepper, and cook it via the reverse sear method.
During the final five minutes of indirect cooking, melt a stick of unsalted butter in a small foil pan right on the grill grates, tossing in four smashed garlic cloves and a few sprigs of thyme. Right after you sear the meat over the hot flames, place it on a warm platter and pour the hot garlic butter directly over the top. Let it pool around the meat while it rests. The warm butter seeps into the resting juices, creating an incredibly rich, velvety sauce.
Step-by-Step Instructions
Step 1: Bring to Room Temperature
Take the meat out of the refrigerator 45 minutes before you plan to light the grill. Cold meat placed directly onto a hot grill will contract sharply, forcing out moisture and causing it to cook unevenly.
Step 2: Trim and Oil
Examine the fat cap. If it’s thicker than a quarter-inch, trim the excess off with a sharp knife so the heat can penetrate efficiently. Lightly coat the entire roast with your high-smoke-point oil.
Step 3: Season Generously
Apply your chosen rub liberally. Don’t be shy; this is a thick piece of meat, and a light dusting won’t flavor the center. Press the seasoning into the meat with your hands so it adheres well.
Step 4: Sear and Roast (Two-Zone Method)
Place the roast on the hot side of the grill. Leave it alone for four to five minutes until it releases naturally from the grates, then flip. Once both sides have a dark crust, move the roast to the indirect, cooler side. Close the grill lid.
Step 5: Check the Temperature
After 20 minutes on the cool side, insert your digital thermometer into the thickest part of the center.
| Desired Doneness | Pull Temperature | Final Temp (After Rest) |
| Rare | 120°F (49°C) | 125°F (52°C) |
| Medium-Rare | 130°F (54°C) | 135°F (57°C) |
| Medium | 140°F (60°C) | 145°F (63°C) |
Step 6: The Mandatory Rest
Transfer the beef to a clean cutting board, tent it loosely with aluminum foil, and walk away for 15 minutes. As the meat sits, the heat coaxes the tight muscle fibers to relax, allowing the delicious juices to redistribute evenly throughout the entire roast instead of rushing out onto your board.
The Art of Slicing
How you carve a tri-tip is just as critical as how you cook it. The muscle fibers in this cut run in two completely different directions. Halfway through the triangle, the grain shifts by roughly 90 degrees.
Look closely at the raw meat beforehand to identify where the grain changes, or look for the lines on the cooked roast. Cut the roast in half right where those two grain directions meet. Then, slice each half into thin strips, always cutting perpendicular (across) the grain lines. Cutting across the grain shortens the muscle fibers, making every single bite melt-in-your-mouth tender.
Expert Cooking Advice
-
Watch for Flare-Ups: The fat cap can drip melted grease onto hot coals or gas burners, creating sudden flames. Keep the meat toward the edge of the direct heat zone during the sear to avoid acrid, black soot marks on your beef.
-
The Tapered Tip Advantage: The thin, narrow point of the triangle will naturally cook faster than the thick center. Embrace this. Position the thickest part of the meat closer to the heat source on the indirect side. The result gives you well-done pieces at the tip for kids or guests who dislike pink meat, while leaving the center perfectly medium-rare.
Common Mistakes to Avoid
-
Skipping the Thermometer: Guessing doneness by time almost always leads to an overcooked, dry roast. A single two-pound tri-tip can take anywhere from 30 to 50 minutes depending on wind, grill lid insulation, and meat thickness. Always cook to temperature, never to time.
-
Slicing Along the Grain: If you slice parallel to the grain lines, you leave the long, ropey muscle strands intact. Your guests will end up chewing on tough, rubbery meat, no matter how perfectly pink you cooked it.
Storage and Reheating
Store any leftovers in an airtight glass container in the refrigerator for up to four days.
To reheat without drying out the meat, avoid the microwave at all costs. Instead, place the slices in a baking dish with a few tablespoons of beef broth, cover tightly with foil, and warm it in a 300°F (149°C) oven for about 10 to 12 minutes. The steam gently warms the beef while keeping it incredibly tender.
Estimated Nutrition Info
Per 4-ounce serving:
-
Calories: 210
-
Total Fat: 11g
-
Saturated Fat: 4g
-
Cholesterol: 80mg
-
Sodium: 320mg (varies based on rub application)
-
Protein: 26g
-
Carbohydrates: 0g
Leave a Reply