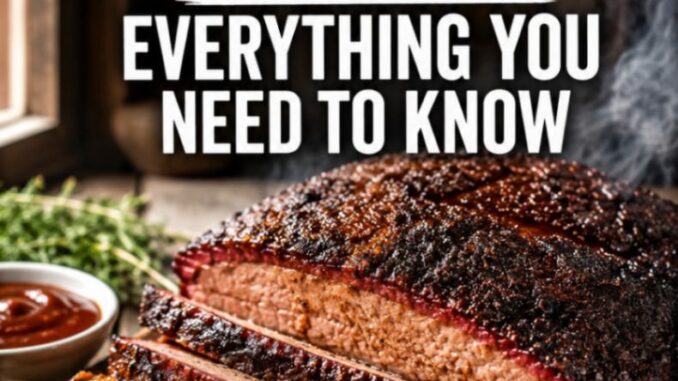
BBQ Secrets: Low and Slow Smoking for Beginners (Everything You Need to Know)
There is something deeply satisfying about taking a tough, unyielding piece of meat, giving it time, heat, and smoke, and watching it transform into something tender enough to pull apart with your fingers.
Welcome to the world of low and slow smoking.
If you have ever felt intimidated by the massive offset smokers, the offset airflow jargon, or the purists insisting you need a degree in thermodynamics to cook a pork shoulder, set all of that aside. Smoking meat isn’t rocket science—it’s an exercise in patience, simple mechanics, and managing fire.
At Recipe Nest (crafted with the warmth of homemade cooking traditions since 2024), we believe that great BBQ should be accessible to anyone willing to fire up a grate. This guide will take you through the fundamental principles of low and slow smoking, step-by-step, so you can pull off incredible barbecue on your very first try.
What Does “Low and Slow” Actually Mean?
At its core, low and slow smoking is cooking meat at indirect low temperatures—typically between 225°F and 275°F (107°C to 135°C)—over an extended period, infused with wood smoke.
Why Low and Slow Works
Traditional high-heat grilling cooks meat quickly, which is great for lean cuts like ribeyes or pork chops. However, larger, tougher cuts—like brisket, pork butt, and ribs—are packed with heavy connective tissue (collagen) and muscle fibers.
-
Collagen Breakdown: When cooked at high heat, collagen contracts rapidly, squeezing out moisture and leaving the meat tough and chewy.
-
The Magic Window: At low temperatures over several hours, collagen breaks down into rich, smooth gelatin. This internal rendering bastes the meat from the inside out, creating that meltingly tender texture everyone craves.
Choosing Your Smoking Setup
You don’t need a custom $5,000 pit to make exceptional barbecue. Here is a quick look at the most common entry points for beginners:
| Smoker Type | Pros | Cons | Best For |
| Kettle Grill (e.g., Weber 22″) | Cheap, versatile, easy to set up indirect heat. | Requires manual vent tweaks to hold temp. | Beginners testing the waters. |
| Pellet Grill | Set-it-and-forget-it controls, very consistent. | Needs electricity, subtle smoke flavor. | Busy cooks who want ease. |
| Bullet Smoker (e.g., WSM) | Excellent temperature stability, small footprint. | Can be tricky to reload charcoal mid-cook. | Hands-on enthusiasts. |
| Offset Smoker | Classic authentic smoke flavor, large capacity. | Steep learning curve, needs constant fire management. | Purists wanting the full ritual. |
Pro Tip for Kettle Owners: Look up the “Snake Method” for long charcoal cooks. Laying your coals in a semicircle around the perimeter allows the fire to burn slowly from one side to the other, maintaining a steady 225°F (107°C) for up to 10 hours without constant reloading.
The Wood: Choosing Your Smoke Flavor
Smoke is an ingredient, not just a heat source. Using too much wood or the wrong combination can turn your meal bitter. As a general rule, matching wood intensity to the meat gives the best balance:
-
Mild Fruitwoods (Apple, Cherry): Light, slightly sweet flavor. Excellent for poultry, pork ribs, and fish. Cherry also gives meat a rich mahogany color.
-
Medium Hardwoods (Hickory, Oak): The gold standard for barbecue. Oak offers a clean, balanced smoke that works on everything, especially beef and pork. Hickory brings a classic, sweet bacon-like aroma.
-
Strong Hardwoods (Mesquite): Very bold, intense, and earthy. It burns hot and can quickly overwhelm meat. Best used sparingly on quick-cooking beef cuts.
Rule of Thumb: Use wood chunks instead of wood chips for low and slow cooks. Chunks smolder gradually over time, whereas chips burn off in minutes.
Essential Gear You Actually Need
Before lighting the coals, make sure you have these three non-negotiable tools:
-
A Dual-Probe Digital Thermometer: Grill-lid thermometers are notoriously inaccurate (often off by 25°F to 50°F). You need a dedicated probe to monitor the air temp right next to the meat, plus a probe inside the meat.
-
Heavy-Duty Aluminum Foil or Butcher Paper: Essential for wrapping meat when tackling the dreaded “stall” (more on that below).
-
Heat-Resistant Gloves: Standard oven mitts won’t cut it when handling hot grates or shifting hot charcoal.
The 5 Fundamentals of a Successful Smoke
1. Prep and Trim
Trim excess outer fat down to roughly 1/4-inch thickness. Leaving too much fat prevents your rub from reaching the meat and leaves a greasy finish, while trimming too much deprives the cook of protective moisture. Always pat the meat dry before applying a light coat of binder (like yellow mustard or olive oil) and your dry rub.
2. Aim for “Thin Blue Smoke”
The biggest mistake beginners make is putting meat on the grate as soon as wood starts billowing heavy white smoke. Heavy white or grey smoke carries soot and creosote, leaving a bitter taste.
You want thin, faint blue smoke (or nearly invisible heat waves). This means your fire is burning efficiently and cleanly.
3. Maintain Steady Airflow
Airflow dictates your fire’s temperature:
-
Opening vents introduces more oxygen, raising the temperature.
-
Closing vents restricts oxygen, lowering the temperature.
Make minor adjustments to your intake vents and give the smoker 15–20 minutes to react before making another tweak.
4. Overcome “The Stall”
Somewhere around 150°F to 170°F (65°C to 77°C) internal temperature, the meat will stop warming up. It might stay stuck at the exact same temperature for two to four hours.
Don’t panic! This is caused by evaporative cooling—the meat is essentially sweating out moisture, cooling itself down as fast as the smoker heats it up.
-
The Fix: Tightly wrap the meat in pink butcher paper or heavy foil with a splash of apple juice or broth. This traps steam, stops evaporation, and carries the cook straight through the stall.
5. Cook to Tenderness, Not Just Time
Recipes give cooking times as broad estimates (e.g., “1.5 hours per pound”), but meat is ready when it is done, not when the clock says so.
Check for doneness using an instant-read thermometer probe:
-
Pork Butt / Brisket: Done when internal temps hit roughly 203°F (95°C), and the probe slides into the center with zero resistance—like pushing a toothpick into warm butter.
-
Ribs: Use the “bend test.” Pick up the rack in the middle with tongs; if the meat cracks open on the surface when it arches, it’s ready.
The Unsung Hero: Rest Your Meat
Once you pull your meat off the smoker, resist the urge to slice into it immediately.
During a 10-hour cook, muscle fibers contract tightly. Resting allows those fibers to relax and reabsorb juices throughout the meat.
-
Small Cuts (Ribs): Rest for 15–30 minutes uncovered.
-
Large Cuts (Pork Butt, Brisket): Wrap in foil, place inside an insulated cooler lined with towels, and let it rest for 1 to 3 hours. It will stay piping hot, and the difference in tenderness is night and day.
Easy Beginner Recipe: The 3-2-1 Smoked Pork Ribs
If you want a foolproof first project to test your skills, try 3-2-1 St. Louis style ribs cooked at 225°F (107°C):
-
3 Hours (Unwrapped): Place seasoned ribs bone-side down on the smoker grate to absorb clean wood smoke and set the rub into a crust (bark).
-
2 Hours (Wrapped): Wrap tightly in aluminum foil along with a few pats of butter, brown sugar, and a splash of apple cider. This steams the meat off the bone.
-
1 Hour (Unwrapped & Glazed): Unwrap, place back on the grate, and brush with your favorite BBQ sauce. Let it cook for the final hour to let the sauce glaze into a shiny, tacky coating.
Final Thoughts
Low and slow smoking is as much a weekend ritual as it is a technique. Don’t worry if your temperature spikes a little or if your first cook takes longer than anticipated—every smoker has a personality, and every piece of meat is unique. Keep your fires clean, monitor your internal temps, give yourself plenty of time, and enjoy the process.
Leave a Reply