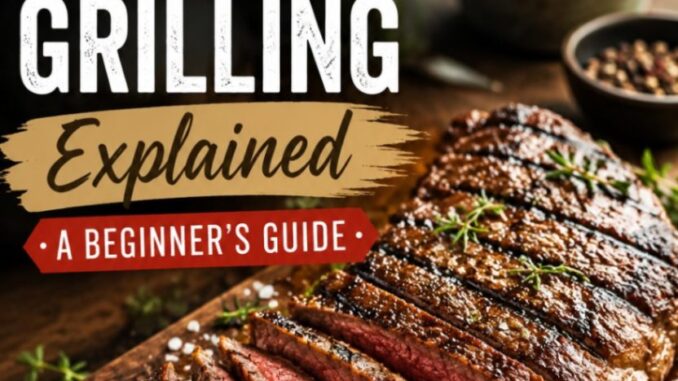
Direct vs. Indirect Grilling Explained — A Beginner’s Guide
Standing in front of a hot grill with a pair of tongs in hand can feel like equal parts culinary freedom and sheer panic. You’ve got a group of hungry friends waiting, a cold drink in hand, and a spread of meat and veggies prepped on the counter. But as soon as you open the lid, you’re faced with the ultimate outdoor cooking crossroads: Do you put the food right over the flames, or off to the side?
Understanding the difference between direct and indirect grilling is the single biggest upgrade you can make to your outdoor cooking game. It’s the line between serving tender, smoky perfection and handing out charred, raw-in-the-middle chicken thighs.
Whether you’re working with a classic charcoal kettle, a sleek gas setup, or a pellet grill, mastering these two foundational zones will turn your backyard into a reliable steakhouse. Let’s break down how they work, when to use each, and how to master both on whatever rig you own.
What Is Direct Grilling?
Direct grilling is the method most people picture when they think of BBQ. Food sits directly above the heat source—whether that’s red-hot charcoal, roaring gas burners, or burning wood logs.
How Direct Heat Works
Direct grilling relies heavily on radiant heat and conduction. Radiant heat beams upward from the fuel source, while conduction transfers heat directly from the scorching metal grates into the surface of your food.
Because the heat source is inches away, temperatures in a direct grilling setup are high, usually ranging from 400°F to 600°F (200°C to 315°C) or more.
Best Foods for Direct Grilling
Direct heat is built for speed. It’s designed for thin, tender cuts of meat and quick-cooking foods that take 15 minutes or less to reach safe internal temperatures. The goal is to sear the outside quickly while bringing the center to perfect doneness before the exterior burns.
-
Burgers and Hot Dogs: Quick-cooking classics that thrive on high heat.
-
Steaks: Ribeyes, strip steaks, and skirt steaks that benefit from a deep, flavorful crust.
-
Pork Chops: Thin-to-medium cut chops cook through quickly over direct heat.
-
Fish Fillets & Shrimp: Delicate seafood that cooks in minutes.
-
Vegetables: Asparagus, zucchini, peppers, and sliced onions that soften and char rapidly.
Pros and Cons of Direct Heat
| Advantages | Challenges |
| Maillard Reaction: Produces deep, savory crusts and grill marks. | High Burn Risk: Sugaries, rubs, and delicate items burn in seconds. |
| Speed: Fast cooking times get food to the table quickly. | Flare-Ups: Dripping fat over open flames creates grease fires. |
| Crispy Texture: Great for achieving texture on skin and edges. | Uneven Doneness: Thick cuts burn outside while staying raw inside. |
Pro Tip: Keep the grill lid off or partially open during short direct-grilling runs to monitor flare-ups and flip food frequently for even browning.
What Is Indirect Grilling?
If direct grilling is like broiling, indirect grilling is like turning your grill into an outdoor convection oven. The heat source is offset to one or both sides of the grill, and the food rests in a cooler zone where no direct flames touch it.
How Indirect Heat Works
Indirect grilling relies primarily on convection heat. When you close the lid, hot air rises from the burners or coals, circulates through the cooking chamber, and surrounds the food.
Cooking temperatures are generally kept lower, usually between 225°F and 350°F (107°C to 175°C). The closed lid is essential—without it, the trapped ambient heat escapes, and the food simply won’t cook.
Best Foods for Indirect Grilling
Indirect heat is ideal for large, dense, or tough cuts of meat that require more than 20 to 30 minutes of cooking time. Lower heat allows the interior to cook gradually without incinerating the exterior.
-
Whole Chickens and Turkeys: Ensures the thighs cook through without turning the breast meat dry.
-
Pork Shoulder & Ribs: Slow-cooks tough connective tissue into tender pork.
-
Beef Brisket & Chuck Roasts: Low-and-slow heat breaks down fat over hours.
-
Thick Steaks or Roasts: Perfect for the “reverse sear” method (more on that below).
-
Delicate Bakes: Pizza, fruit cobblers, or cornbread that need even, oven-like heat.
Pros and Cons of Indirect Heat
| Advantages | Challenges |
| Even Cooking: Cook large cuts thoroughly without burning. | Time Consuming: Cooking times range from 45 minutes to several hours. |
| No Flare-Ups: Drippings fall into heat-free zones, eliminating fires. | No Crust/Searing: Doesn’t produce deep grill marks or crispy crusts on its own. |
| Tenderness: Low temperatures melt fat and collagen over time. | Fuel Heavy: Consumes more charcoal or gas over long cooks. |
The Secret Weapon: Two-Zone Setup
Why settle for choosing between direct and indirect heat when you can have both simultaneously?
The Two-Zone Cooking Setup is the holy grail of backyard grilling. By arranging your heat source on one side of the grill and leaving the other side clear, you create two distinct cooking environments: a Sear Zone (direct) and a Safe/Convection Zone (indirect).
Why Every Beginner Needs a Two-Zone Setup
-
Total Temperature Control: If your chicken starts charring too fast over the flames, simply slide it over to the indirect side to finish cooking safely.
-
Flare-Up Management: Dripping fat causing a grease fire? Move the food to the indirect side until the flames die down.
-
The “Reverse Sear” Mastery: Cook a thick steak on the indirect side until the center reaches roughly 115°F (46°C), then transfer it to the direct side for 60 seconds per side to build a massive crust.
How to Set Up Your Grill for Two-Zone Cooking
1. Gas Grills
Gas grills make two-zone setups effortless because you control individual burner knobs.
-
For a 2-Burner Grill: Turn one burner to Medium-High and leave the second burner completely OFF.
-
For a 3-Burner or 4-Burner Grill: Turn the outer burners to Medium or High, and leave the center burner(s) OFF. Alternatively, turn the left half ON and the right half OFF.
-
Temperature Regulation: Adjust the active burners until your built-in lid thermometer registers your target ambient temperature (usually 300°F–350°F).
2. Charcoal Grills (Kettle Style)
Charcoal requires a little physical labor, but yields incredible smoky flavor.
-
The Banked Method: Light your charcoal using a chimney starter. Once covered in gray ash, pour all the coals onto one side of the lower charcoal grate. Leave the other half completely bare.
-
The Ring/Snake Method: For very long indirect cooks, place unlit coals in a half-moon ring around the edge of the charcoal grate and place a few lit coals at one end to slowly burn across.
-
Vent Control: Place the lid on top with the exhaust vent sitting directly over the indirect side. This forces the hot air and smoke to draft across the food before escaping.
3. Pellet Grills & Smokers
Most modern pellet grills operate via heat deflector plates, meaning they are natively indirect convection cookers. To grill directly on a pellet grill, you typically slide open the flame broiler plate (if equipped) to expose the fire pot, or crank the ambient temperature to maximum (450°F–500°F) to heat up cast-iron grates.
Cheat Sheet: Which Method Should You Use?
When deciding where to place your food, ask yourself one simple question: “How long will this take to cook through?”
Essential Beginner Tips for Grilling Success
1. Invest in an Instant-Read Digital Thermometer
Stop cutting into your meat to see if it’s done. Juices escape, and color can be deceiving under outdoor light. An instant-read probe thermometer takes the guesswork out of grilling—pull your meat based on internal temperature, not time.
2. Clean and Oil Your Grates
Food sticks to dirty, dry grates—especially when cooking directly over high heat. Clean your grates with a grill brush while they are hot, then use a folded paper towel dipped in cooking oil (held with tongs) to wipe down the grates right before adding food.
3. Mind Your Rubs and Sauces
Barbecue sauces containing sugar or honey will burn quickly over direct heat, turning bitter and black in under two minutes.
-
For Direct Grilling: Apply sugary barbecue sauces during the last 2 to 3 minutes of cooking just to warm and glaze them.
-
For Indirect Grilling: You can apply sauces slightly earlier, as ambient heat caramelizes sugar without burning it as aggressively.
4. Respect the Lid
-
Lid Off: Best for direct grilling thin cuts where you need high heat from below and want to keep a close eye on flare-ups.
-
Lid On: Essential for indirect grilling to trap ambient heat and smoke, turning your grill into an oven.
Final Thoughts: Practice Makes Perfect
Grilling isn’t an exact science; it’s a craft that improves with every cook. By shifting away from cooking everything over roaring open flames and adopting a simple two-zone setup, you immediately eliminate burnt exteriors, raw centers, and unexpected flare-ups.
Next time you fire up the grill, bank those coals to one side or turn off a burner. Give yourself an indirect safe zone, keep your thermometer handy, and enjoy the confidence that comes with complete heat control. Happy grilling!
Leave a Reply