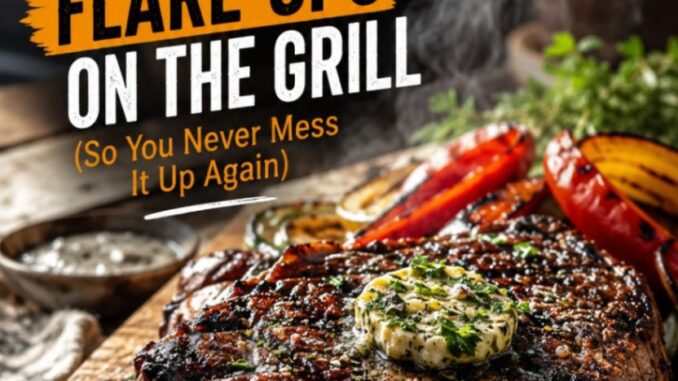
How to Avoid Flare-Ups on the Grill (So You Never Mess It Up Again)
There is a familiar scene that plays out in backyards across the country every weekend.
You set your steaks or chicken thighs on the grates, step back for thirty seconds to grab a cold drink or chat with a friend, and turn around to find your grill enveloped in a tower of roaring orange flames. In a flash of panic, you grab a pair of tongs, duck through thick black smoke, and battle the inferno to save dinner. By the time the fire subsides, your beautiful meal is covered in bitter, soot-black carbon, and the inside remains stubbornly raw.
Grill flare-ups are the single most common frustration in outdoor cooking. They ruin expensive cuts of meat, create dangerous working conditions, and turn what should be an enjoyable afternoon into a stressful fire-drill.
The good news? Flare-ups are not an inevitable tax you have to pay for cooking over an open flame. They are simple, predictable physical reactions that happen for very specific reasons. Once you understand what causes them and follow a few fundamental guidelines, you can eliminate them from your cookouts forever.
The Science of a Flare-Up: What Is Actually Happening?
To stop flare-ups, you first have to understand the trifecta that creates them: fat, heat, and oxygen.
When meat cooks, fat renders and liquefies. That liquid fat drips down through the grates and hits a hot surface below—whether that’s red-hot charcoal coals, gas burner tent shields, or ceramic flavorizer bars. When fat hits a surface heated to 500°F or higher, it doesn’t just sizzle; it vaporizes and ignites.
A small sizzle with a gentle burst of smoke is normal and desirable—it is what gives grilled food its distinctive, wood-fired flavor. But when a large amount of fat pools up and catches fire while the grill lid is open, oxygen feeds the flame, turning a tiny flare into a localized grease fire.
There is a huge difference between searing (cooking food with radiant heat to develop a caramelized crust) and burning (engulfing food in open grease flames). Flare-ups do not sear your food; they deposit unburnt hydrocarbons and soot onto the meat, leaving behind an acrid, chemical taste that completely masks the flavor of your seasoning.
Essential Guidelines to Prevent Flare-Ups Before You Light the Fire
Preventing flare-ups begins long before you put food on the grates. By incorporating these pre-grill habits into your routine, you eliminate the vast majority of fire hazards before they ever start.
1. Clean Your Grill Thoroughly and Frequently
The single biggest cause of unexpected, uncontrollable grill fires is residual grease buildup from previous cooks. Old grease pools in the bottom of the firebox, coats the heat deflectors, and fills the drip tray underneath.
-
Scrape the Grates Cold and Hot: Brush your grates clean after every cook while the grill is still warm, and give them a quick scrub before adding new food.
-
Empty the Drip Pan: Check the grease cup underneath your gas or pellet grill before every session. A full drip tray is a massive fire hazard waiting for a spark.
-
Deep Clean the Firebox: Every 5 to 10 cooks, remove the grates and heat shields to scrape away hardened carbon, food debris, and accumulated grease from the bottom of the grill cavity.
2. Trim Excess Fat Cap
Fat adds flavor and moisture, but too much external fat on a cut of meat is a guaranteed trigger for flare-ups.
-
Trim thick fat caps down to about 1/8 inch to 1/4 inch. This provides plenty of fat for flavor and basting without creating massive pools of rendering grease that drip directly onto your heat source.
-
Pay special attention to chicken thighs, pork chops, and ribeye steaks, which often come with loose flaps of heavy fat along the edges.
3. Stop Drowning Meat in Oil and Marinades
Oil is a fantastic heat conductor, but oil drippings fuel fires instantly. A widespread mistake is slathering meat or vegetables in oil before tossing them onto the fire.
-
Oil the Food, Not the Grates: Never pour oil directly onto hot grill grates—it burns off immediately, creates smoke, and drops into the burners. Instead, lightly brush or rub a thin coat of high-smoke-point oil (like avocado or canola oil) directly onto the food.
-
Wipe Off Excess Marinade: If you marinate meat in an oil- or sugar-heavy liquid, wipe off the excess marinade with a paper towel before placing the meat on the grill. The flavor is already inside the meat; the liquid pooling on the surface will only drip down and catch fire.
4. Manage High-Fat Foods with Care
Certain foods—like fresh pork sausages, bacon, duck breast, and 70/30 ground beef patties—contain so much fat that flare-ups are almost guaranteed if cooked directly over high heat.
-
For these ingredients, avoid placing them over direct, blazing flames from start to finish. Pricking sausage casings is also a bad idea; it releases jets of hot fat directly onto the heat source. Cook sausages whole and intact so juices stay inside.
In-the-Moment Guidelines for Temperature and Fire Control
Even with careful prep work, fat will still render as food cooks. Managing the fire while cooking requires smart technique and proper zone management.
5. Always Set Up a Two-Zone Fire
If you take only one rule away from this guide, let it be this: never cook across 100% of your grill surface at high heat.
A two-zone setup creates a hot zone (direct heat) and a cool zone (indirect heat).
-
On a Gas Grill: Turn one or two burners to high/medium and leave at least one burner completely off.
-
On a Charcoal Grill: Pile all lit coals on one side of the grill floor, leaving the other side empty.
The cool zone serves as your safety net. If a flare-up starts on the hot side, you simply move the food over to the cool side until the fire dies down. You can continue cooking the food gently using indirect convection heat without burning it.
6. Keep the Grill Lid Closed
Oxygen fuels fire. When you leave the grill lid wide open, you feed continuous air to any small flame, turning a minor drip into a roaring blaze.
-
Cook with the lid down whenever possible. Closing the lid restricts airflow, which starves small flare-ups of oxygen before they can grow into real problems.
-
Controlling vents on a charcoal grill is equally critical. If you notice the fire getting out of control, partially closing the top and bottom dampers chokes the oxygen supply and cools the fire down rapidly.
7. Ditch the Water Squirt Bottle Myth
For decades, backyard cooks kept a spray bottle filled with water next to the grill to squirt flare-ups. This is one of the most counterproductive and dangerous habits in outdoor cooking.
-
Squirt bottles do not put out grease fires; water repels oil. Squirted water turns instantly to steam, atomizing burning fat droplets and scattering hot grease and ash everywhere.
-
Furthermore, spraying cold water onto hot cast iron or ceramic components can thermal-shock and crack your grill grates.
-
Instead of water, use your indirect heat zone to let flames extinguish naturally.
Step-by-Step Emergency Protocol: What to Do When a Flare-Up Happens
Despite your best efforts, a surge of flames can still occur when rendering heavy fats. If a sudden flare-up catches your food in open fire, follow this exact step-by-step procedure to regain control safely:
Step 1: Stay Calm and Act Quickly
Do not panic or drop the tongs. Flare-ups happen fast, but as long as you act methodically, your meal will be fine.
Step 2: Move the Food to the Indirect Heat Zone
Immediately pick up the offending piece of food with long-handled tongs and shift it over to the cool side of the grill (where there are no burning coals or active gas burners underneath).
Step 3: Close the Grill Lid
Cover the grill immediately. Closing the lid cuts off the draft of fresh air feeding the fire below the grates. Without oxygen, the burning grease on the heat plates or coals will burn itself out in 10 to 15 seconds.
Step 4: Wait for the Smoke to Clear
Watch the exhaust vents or lid edges. The thick black smoke from burning grease will thin out and turn back into light, clean smoke once the flare-up has died down.
Step 5: Resume Cooking
Once the flames are gone, open the lid and resume cooking. If you need to return the food to the direct heat zone to finish searing, do so carefully, turning the pieces frequently to prevent fat from pooling in one spot again.
Summary Checklist for Flare-Free Grilling
Keep these essential guidelines in mind every time you fire up the grates:
-
Clean: Scrape grates every cook and empty the grease tray regularly.
-
Trim: Cut external fat caps down to 1/4 inch or less.
-
Pat Dry: Remove excess oil and dripping marinades from food surfaces before grilling.
-
Zone: Always maintain an indirect, heat-free safe zone on one side of your grill.
-
Cover: Keep the lid down to starve small flames of oxygen.
-
Move: Shift flare-producing food to indirect heat rather than fighting flames with water.
By shifting your mindset from battling flames to controlling airflow, grease, and heat zones, you take total command of your grill. You will protect your ingredients, eliminate bitter charred soot, and cook consistently juicy, perfectly seared meals every single time.
Leave a Reply