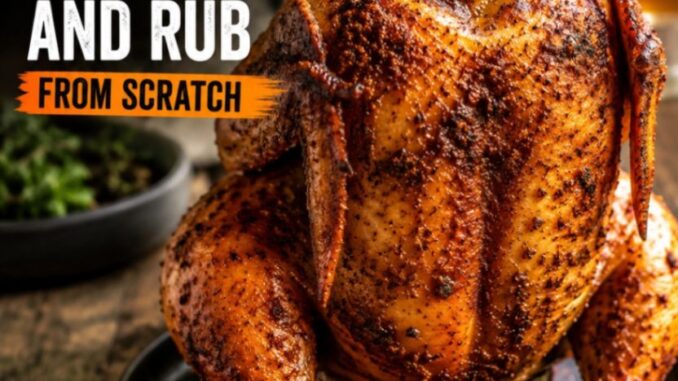
How to Make Beer Can Chicken Marinade and Rub From Scratch
There is a reason beer can chicken remains a legend of backyard barbecue. When done correctly, the technique yields a bird with shatteringly crisp skin on the outside and exceptionally tender, juicy meat on the inside. Standing the chicken upright over an open can of beer creates a convection effect on the grill while the evaporating liquid steams the internal cavity, keeping the breast meat from drying out long before the thighs are fully cooked.
However, the technique itself is only half the equation. The secret to a truly unforgettable beer can chicken lies in a two-step flavor strategy: a wet marinade that seasons and hydrates the muscle fibers deep within, paired with a custom dry rub applied right before cooking to build a fragrant, caramelized crust.
Skip the pre-packaged foil packets from the grocery store. They are usually loaded with excessive sodium, anti-caking agents, and stale spices that lost their potency months ago. Making your marinade and rub from scratch gives you total control over heat, sweetness, and acidity. Here is everything you need to know to craft the ultimate beer can chicken marinade and rub from scratch.
The Dual-Flavor Strategy: Why You Need Both
Many home cooks ask whether they should use a marinade or a dry rub. The short answer is that for whole poultry, using both produces superior results because each serves an entirely different purpose.
-
The Marinade (Internal Flavor and Tenderness): Marinades use salt, acid, fat, and liquid aromatics to penetrate the meat. Salt alters the protein structure so the meat holds on to moisture during cooking, while acid breaks down surface proteins for a tender bite.
-
The Dry Rub (External Bark and Crisp Skin): Dry rubs sit on the exterior. Ingredients like sugars, dried herbs, and ground spices react with the heat of the grill to create a deeply flavorful brown crust—often referred to as a “bark”—while rendering down the fat beneath the skin so it crisps up rather than turning rubbery.
By pairing a overnight liquid soak with a freshly blended spice coat, you ensure that every bite, from the skin to the deep bone, is rich with flavor.
Step 1: The Scratch Beer & Herb Marinade
This marinade uses a balance of citrus, garlic, herbal notes, and a splash of beer to echo the flavors evaporating inside the grill.
Ingredients List
-
1 cup amber ale or lager (save the rest of the 12-ounce can for cooking)
-
1/2 cup extra virgin olive oil
-
1/3 cup fresh lemon juice (about 2 large lemons)
-
3 tablespoons apple cider vinegar
-
6 cloves garlic, peeled and smashed
-
2 tablespoons kosher salt
-
1 tablespoon coarsely ground black pepper
-
1 tablespoon fresh rosemary sprigs, lightly bruised
-
1 tablespoon fresh thyme sprigs
-
1 bay leaf
How to Prepare and Use the Marinade
-
Whisk the Liquids and Salt: In a large glass or stainless steel bowl, combine the lemon juice, apple cider vinegar, and kosher salt. Whisk vigorously until the salt crystals fully dissolve. This ensures the seasoning is evenly distributed throughout the liquid.
-
Incorporate the Aromatics: Pour in the beer and olive oil. Add the smashed garlic cloves, bruised rosemary, thyme sprigs, bay leaf, and black pepper. Whisk again to combine.
-
Submerge the Chicken: Place a whole 4 to 5-pound chicken into a large food-grade sealable bag or a deep, non-reactive vessel. Pour the marinade directly over the chicken, making sure liquid coats both the cavity and the exterior skin.
-
Chill and Wait: Seal the bag, pressing out as much air as possible. Refrigerate for at least 4 hours, or ideally overnight (8 to 12 hours). Turn the bag once or twice during the process to keep the coverage even.
Step 2: The Signature Sweet & Smoky Dry Rub
While the chicken marinates, assemble your dry rub. This blend mixes dark brown sugar for subtle caramelization with smoky paprika, garlic, onion, and dried herbs.
Ingredients List
-
3 tablespoons dark brown sugar, packed
-
2 tablespoons smoked paprika
-
1 tablespoon kosher salt
-
1 tablespoon garlic powder
-
1 tablespoon onion powder
-
1 teaspoon dried oregano
-
1 teaspoon dried thyme
-
1 teaspoon cracked black pepper
-
1/2 teaspoon mustard powder
-
1/2 teaspoon cayenne pepper (adjust to taste for heat)
How to Blend and Apply the Rub
-
Mix the Dry Ingredients: Add the brown sugar to a small mixing bowl first. Use your fingers or a small fork to break up any clumps so it mixes smoothly with the spices.
-
Combine and Store: Add the smoked paprika, kosher salt, garlic powder, onion powder, oregano, thyme, black pepper, mustard powder, and cayenne pepper. Whisk until uniform. If making extra, store it in an airtight glass jar in a cool, dark place for up to three months.
-
Apply After Marinating: Once the chicken comes out of the marinade, pat the exterior completely dry with paper towels (moisture is the enemy of crisp skin). Lightly coat the skin with a tiny drizzle of oil or melted butter, then generously shake the rub all over the outside, under the skin over the breast meat, and inside the cavity.
Essential Guidelines for Beer Can Chicken Success
To make sure your cook goes off without a hitch, follow these practical guidelines step by step.
1. Temperature Control and Food Safety
-
Keep it Chilled: Always keep your chicken refrigerated at or below 40°F (4°C) while marinating. Never marinate raw poultry on the kitchen counter at room temperature.
-
Discard Used Marinade: Never reuse liquid that has touched raw chicken as a sauce or basting fluid unless it has been brought to a rolling boil for at least 5 full minutes. It is generally safer and cleaner to discard it.
-
Target Internal Temperature: Always use an instant-read meat thermometer inserted into the thickest part of the thigh without touching the bone. Chicken is safe and juicy when the thigh reaches 165°F to 170°F (74°C–77°C) and the breast reads 160°F to 165°F.
2. Choosing and Preparing the Beer Can
-
Pick the Right Beverage: Pilsners, amber ales, pale ales, and wheat beers work brilliantly. Avoid heavy stouts or overly bitter IPAs, as intense hop profiles can become harsh and acrid when heated for an hour. If you prefer not to cook with alcohol, non-alcoholic beer, chicken broth, or spiced apple cider in a clean 12-ounce beverage can works just as well.
-
Prep the Can: Open the can and pour out (or drink) about half of the liquid. You need room inside the can so it doesn’t boil over rapidly when heated.
-
Ventilate the Can: Use a clean punch-style can opener to punch 2 or 3 extra holes in the top lid of the can. This allows maximum steam and aroma to escape directly up into the bird’s internal cavity during cooking.
-
Add Aromatics to the Can: Drop a smashed garlic clove, a strip of lemon peel, or a sprig of fresh rosemary directly into the half-full beer can before mounting the chicken. As the liquid heats, it drives those essential oils right into the meat from the inside out.
3. Setting Up the Grill
-
Use Indirect Heat: Direct heat right beneath the standing chicken will scorch the bottom of the bird and burn the sugar in your rub before the inside finishes cooking. Set your grill up for two-zone cooking at a target temperature of 350°F to 375°F (175°C to 190°C).
-
On a gas grill, turn on the outer burners and leave the center burner off. Place the chicken in the middle over the unlit zone.
-
On a charcoal grill, push lit coals to two opposite sides of the bottom grate and place a drip pan in the center. Stand the chicken over the drip pan.
-
-
Create a Stable Base: Lower the chicken’s cavity directly over the open beer can so the can sits securely inside. Angle the chicken’s legs forward to form a stable tripod with the base of the can. This prevents the bird from tipping over when you open or close the grill lid.
4. Cooking and Resting
-
Keep the Lid Closed: Resist the urge to open the grill lid every ten minutes. Every time you open the dome, heat escapes, extending your cook time and dropping the ambient moisture levels.
-
Cook Time Estimate: A standard 4-pound chicken typically takes between 60 and 75 minutes at 350°F–375°F.
-
Rest Before Carving: Once the chicken hits 165°F, carefully transfer it (with tongs supporting the base and top) to a clean cutting board or sheet tray. Let it rest upright or carefully remove the hot can using tongs, then tent the bird loosely with foil for 15 minutes before carving. Resting allows the internal juices to redistribute throughout the meat rather than rushing out onto your board.
Flavor Variations to Try Next
Once you master this baseline recipe, you can easily adapt the rub and marinade profiles to suit different culinary styles:
-
Tex-Mex Fiesta: Swap the lemon juice in the marinade for fresh lime juice. Add 1 tablespoon of ground cumin, 1 tablespoon of chili powder, and a pinch of dried Mexican oregano to the rub. Use a light Mexican lager in the can.
-
Garlic Herb & Cider: Replace the beer in the marinade with hard apple cider. Add 1 tablespoon of dried sage and double the garlic powder in the rub. Use hard cider or apple juice inside the cooking can.
-
Carolina Sweet Heat: Increase the dark brown sugar in the rub by an extra tablespoon and add 1 teaspoon of hot cayenne pepper along with 1/2 teaspoon of crushed red pepper flakes. Use a classic golden lager in the can.
By combining a balanced wet marinade with a handcrafted dry rub, you eliminate the guesswork and ensure your beer can chicken comes off the grates perfectly seasoned, beautifully browned, and incredibly juicy every single time.
Leave a Reply