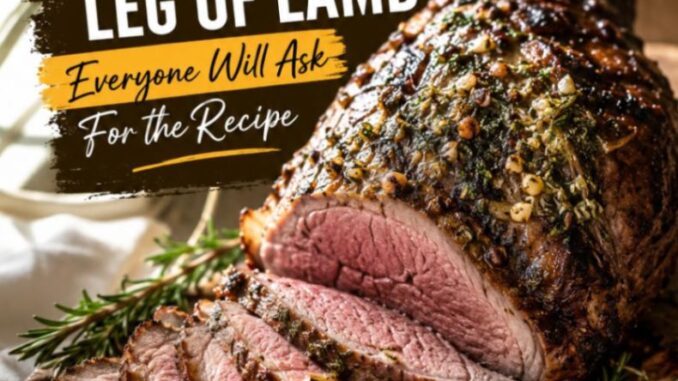
7 Ways to Make Grilled Leg of Lamb Everyone Will Ask For the Recipe

There is something deeply satisfying about pulling a massive, beautifully charred roast off the grates while your friends stand around the patio sniffing the air. For a long time, I only made a grilled leg of lamb for major holidays, thinking it was too fussy or expensive for a casual weekend. But once you figure out how forgiving this cut actually is when it hits the fire, it quickly becomes your go-to for summer block parties and family get-togethers.
Getting a grilled leg of lamb right doesn’t require a culinary degree, but it does require a few good techniques to keep it juicy from the crust to the bone. Whether you bought a boneless roast tied up in netting or a massive bone-in cut that barely fits on your grates, these seven proven strategies will help you nail the temperature, maximize the crust, and have everyone at the table asking you for the secret recipe.
Why You’ll Love This Grilled Leg of Lamb
-
Feeds a Crowd Efficiently: A single roast easily satisfies eight to ten hungry adults, making it much easier to manage than flipping a dozen individual steaks.
-
Incredible Texture Contrast: You get a beautiful, salty exterior bark while the center remains incredibly tender and rosy.
-
Highly Adaptable: Lamb pairs beautifully with standard backyard herbs like rosemary, mint, and oregano, meaning you rarely need to buy exotic ingredients.
1. The Direct-Indirect Fire Method (For Perfect Doneness)
The biggest mistake people make with a large roast is keeping it directly over the hot coals the entire time. You end up with a burnt, bitter exterior and a raw, cold center. Instead, build a two-zone fire.
Start your lamb on the cooler side of the grill with the lid closed. This allows the meat to roast gently, heating evenly from the outside in. I like to keep my grill ambient temperature around 325°F for this stage. Once the internal temperature hits about 120°F, move the meat directly over the hot coals for the final five minutes. This reverse-sear method creates an incredible, sizzling mahogany crust without overcooking the layer of meat just underneath the surface.
2. Butterflying for Speed and Surface Area
If you are short on time, ask your butcher to remove the bone and butterfly the meat. This opens the leg up like a book, creating a relatively flat, uneven sheet of meat.
While an uneven thickness might sound like a drawback, it is actually a backyard cook’s secret weapon. The thinner edges will cook to a perfect medium-well, while the thick center stays a juicy medium-rare. This means you can satisfy the guest who panics at the sight of pink meat and the purist who demands it, all from the same piece of meat. Plus, more surface area means more room for your garlic and herb rub.
3. The Overnight Dry Brine Trick
Salt needs time to do its job. If you sprinkle salt on your lamb right before it hits the grill, it will draw moisture out to the surface, preventing a good sear.
Instead, season your grilled leg of lamb generously with kosher salt the night before you plan to cook. Place it on a wire rack set inside a baking sheet and leave it uncovered in your refrigerator. The salt draws into the meat, seasoning it all the way to the center while drying out the exterior skin. When it hits the grill the next day, that dry surface transforms into a crisp, deeply savory bark almost instantly.
4. The Wet Herb Paste Coating
Lamb has a robust flavor that can handle strong aromatics. A simple dry rub can burn easily over the fire, so I prefer making a thick paste using fresh herbs and olive oil.
Mince a handful of fresh rosemary, oregano, and plenty of garlic. Mix it with just enough good olive oil to form a wet sludge, then slather it all over the meat after your dry brining phase. The oil acts as a heat conductor on the grill, frying the herbs against the meat rather than letting them scorch to ash. You will smell the garlic toasting the second the meat hits the grates.
5. Wrapping for the Final Rest
Resting your meat is non-negotiable. If you slice into a leg of lamb fresh off the grates, all the pressurized juices will flood onto your cutting board, leaving the actual meat dry and chewy.
Pull the lamb off the grill when it is about five degrees below your target temperature. Place it on a warm platter, tent it loosely with aluminum foil, and walk away for at least twenty minutes. The residual heat will finish cooking the center, and the muscle fibers will relax, locking those delicious juices inside the meat where they belong.
6. The Bright Acid Baste
Because lamb is a naturally rich, fatty meat, it benefits immensely from a splash of acid during the final stages of cooking.
Mix a little fresh lemon juice or red wine vinegar with a splash of olive oil and a pinch of red pepper flakes. During the last ten minutes of grilling, lightly brush this mixture over the meat. The acid cuts through the richness, brightens the herbal flavors, and helps create a beautiful sheen on the finished roast.
7. Carving Against the Grain
You can execute every cooking step perfectly, but if you slice the meat incorrectly, it will still feel tough to your guests.
Take your time to look at the meat and identify which way the long muscle fibers are running. Always slice perpendicular to those lines. Shortening the muscle fibers makes every bite incredibly tender and easy to chew. Slice the meat into thin pieces—about a quarter-inch thick—and arrange them on a platter with any accumulated juices poured right back over the top.
Ingredients You’ll Need
-
5-to-7 Pound Leg of Lamb: Bone-in offers more flavor, while boneless cooks faster and is easier to carve.
-
Kosher Salt and Coarse Black Pepper: For building the base seasoning layer.
-
Fresh Rosemary and Oregano: Avoid the dried stuff in the jar here; fresh herbs make a massive difference on the grill.
-
Garlic: Freshly minced cloves, not the pre-jarred variety which can taste bitter when charred.
-
Olive Oil: To bind the herbs and help sear the exterior.
-
Fresh Lemons: For that crucial acidic finish.
Ingredient Substitutions
-
The Herbs: If you don’t have fresh oregano, fresh thyme or even a bit of chopped mint works beautifully.
-
The Acid: Red wine vinegar or a splash of dry white wine can replace the lemon juice in the final baste.
-
Garlic Substitute: If you run out of fresh garlic, garlic paste from a tube is a better backup than garlic powder, which burns too quickly over open flames.
Step-by-Step Instructions
Step 1: Prep and Brine
The night before grilling, trim away any excessively thick patches of hard white fat from the exterior, leaving a thin layer to protect the meat. Season the entire leg generously with kosher salt, place it on a wire rack, and refrigerate it uncovered overnight.
Step 2: Apply the Herb Paste
Two hours before you want to start cooking, pull the lamb out of the fridge to take the chill off. Mix your minced rosemary, oregano, garlic, black pepper, and olive oil into a paste. Rub it thoroughly into every crevice of the meat.
Step 3: Set Up the Grill
Prepare your charcoal or gas grill for two-zone cooking. You want a hot side for searing and a cooler, indirect side that registers around 325°F with the grill lid down. Clean and oil your grates thoroughly.
Step 4: Slow Roast (Indirect Heat)
Place the lamb on the cooler, indirect side of the grill. Close the lid with the vents positioned over the meat to draw the smoke across it. Let it cook undisturbed for about 45 to 60 minutes, checking the internal temperature periodically with a digital meat thermometer.
Step 5: The Final Sear (Direct Heat)
When the thickest part of the meat reaches 120°F for medium-rare, move the lamb directly over the hot coals. Sear it for 2 to 3 minutes per side, brushing lightly with your lemon juice and oil mixture, until the exterior is beautifully browned and crisp.
Step 6: Rest and Carve
Remove the lamb from the heat at 130°F (it will rise to 135°F as it rests). Tent it loosely with foil and let it rest on a cutting board for 20 minutes. Slice thin against the grain and serve immediately.
Expert Tips for the Best Results
-
Trust the Thermometer, Not the Clock: Every leg of lamb is shaped differently, and every grill runs at a slightly different temperature. A reliable digital meat thermometer is the only way to guarantee you don’t overcook the meat.
-
Watch for Flare-Ups: Lamb fat renders quickly over direct heat. Keep a safe zone on your grill empty so you can slide the meat away if the flames get too aggressive during the searing phase.
-
Keep the Foil Loose: When resting the meat, never wrap the foil tightly around it. A tight wrap traps the escaping steam, which will soften that gorgeous crisp crust you just worked so hard to build.
Common Mistakes to Avoid
-
Cooking it Cold: Putting a cold leg of lamb straight from the fridge onto the grill causes the muscle fibers to tense up, resulting in tough meat and uneven cooking. Always let it sit at room temperature for a couple of hours first.
-
Overcooking Past Medium: Lamb becomes increasingly dry and gamey the longer it cooks. Aim for a rosy medium-rare to medium center for the best flavor and texture.
-
Neglecting the Grate Cleaning: Because lamb is a premium cut, you don’t want it sticking to old fish or chicken residue on dirty grates. Give the grill a thorough scrubbing before the meat goes on.
Storage and Reheating
Leftover grilled leg of lamb keeps beautifully in the refrigerator for up to four days when stored in an airtight container.
To reheat it without drying it out, place the slices in a shallow baking dish with a splash of beef broth or water. Cover the dish tightly with aluminum foil and warm it in a 300°F oven for about 10 minutes. This gently steams the meat, reviving its tenderness without cooking it any further.
Estimated Nutrition Information
Serving Size: 4 ounces of cooked meat
| Nutrient | Amount |
| Calories | 230 |
| Total Fat | 12g |
| Saturated Fat | 4.5g |
| Cholesterol | 85mg |
| Sodium | 320mg |
| Protein | 28g |
| Carbohydrates | 1g |
Note: Nutrition values are estimates based on standard trimming practices and average meat yields.
Leave a Reply