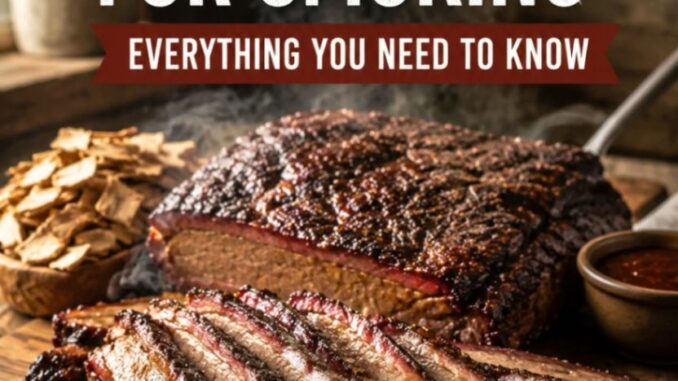
A Guide to Wood Chips for Smoking: Everything You Need to Know
When you step into the world of live-fire cooking, you quickly realize that heat is only half the equation. Temperature cooks the food, but smoke gives it character. Among all the options available to the outdoor cook—logs, chunks, pellets, and sawdust—wood chips stand out as the most versatile, accessible, and user-friendly entry point for infusing genuine hardwood flavor into your meal.
Whether you are running a classic kettle grill on a weekend afternoon, operating a dedicated propane smoker, or trying to squeeze smoked flavor out of a standard gas grill, wood chips are your best tool for short to medium cooking sessions.
This guide breaks down everything you need to know about wood chips: how they work, how the different wood varieties behave, how to use them across various equipment setups, and how to avoid common mistakes that lead to bitter, over-smoked food.
Wood Chips vs. Chunks, Pellets, and Logs
To understand where wood chips excel, it helps to see how they fit into the broader family of smoking fuels.
Wood chips are scrapings or small sliced pieces of dried hardwood, typically ranging from a quarter-inch to two inches in length. Because of their high surface-area-to-volume ratio, they ignite quickly and release smoke almost immediately.
This rapid ignition makes them ideal for foods that cook in under two hours—such as pork chops, chicken pieces, fish, steaks, vegetables, and sausage. For massive cuts requiring all-day cooks (like a whole brisket or pork shoulder), larger chunks or logs are better suited to provide sustained smoke over many hours. However, by layering or replenishing wood chips in batches, you can easily use them for longer cooks as well.
The Flavor Spectrum: Profile Guide by Wood Type
Not all wood smoke tastes the same. The chemical compounds within hardwood fibers breakdown under heat to produce specific aroma profiles. Selecting the right wood chip comes down to matching the intensity of the wood to the density and natural flavor of the meat.
Mild & Fruitwoods
-
Apple: Produces a sweet, light, fruity smoke. It takes time to permeate the meat, making it practically impossible to over-smoke your dish.
-
Best paired with: Pork chops, pork loin, chicken, turkey, and delicate fish like trout.
-
-
Cherry: Similar to apple in sweetness, but with a distinct advantage: cherry smoke imparts a deep, mahogany red color to meat surfaces.
-
Best paired with: Duck, chicken, ribs, pork shoulder, and beef brisket (often mixed with oak).
-
-
Alder: Delicate, soft, and slightly sweet with neutral tones. It is the classic choice in Pacific Northwest barbecue traditions.
-
Best paired with: Salmon, white fish, seafood, and poultry.
-
Medium & Balanced Hardwoods
-
Oak: The gold standard of smoking woods. Oak delivers a clean, balanced, medium-heavy smoke profile that sits right in the middle of the flavor spectrum. It burns consistently and creates an excellent bark on beef and pork.
-
Best paired with: Beef brisket, beef ribs, pork, lamb, and game meats.
-
-
Pecan: A relative of the hickory tree, pecan offers a rich, nutty flavor that is sweeter and less aggressive than hickory. It adds a deep golden-brown tint to meat.
-
Best paired with: Poultry, pork ribs, ribs, chops, and roasted nuts or cheeses.
-
-
Maple: Mildly sweet with subtle woodsy undertones. It adds a delicate sweetness without overpowering delicate meats.
-
Best paired with: Poultry, pork, vegetables, and bacon curing.
-
Bold & Strong Hardwoods
-
Hickory: The undisputed king of Southern barbecue. Hickory delivers a pungent, savory, sweet, and heavy smoke profile reminiscent of quality bacon. Use it with care; too much hickory smoke can leave a bitter taste on lean meats.
-
Best paired with: Pork shoulder (pulled pork), ribs, beef brisket, and wild game.
-
-
Mesquite: Highly aromatic, oily, and intense. Mesquite produces huge volumes of strong smoke quickly. Because it burns fast and hot, it is best reserved for quick-grilling steaks or short smoking sessions.
-
Best paired with: Flank steak, skirt steak (fajitas), beef ribs, and chili peppers.
-
The Great Soak Debate: To Wet or Not to Wet?
One of the most common questions beginners ask is: Should I soak my wood chips in water before putting them on the fire?
For decades, conventional wisdom suggested soaking wood chips in water for 30 to 60 minutes prior to cooking to prevent them from burning up immediately. However, food science and pitmaster experience have proven that soaking is largely unnecessary and, in many cases, counterproductive.
Why Soaking Isn’t Recommended
-
Wood Doesn’t Absorb Water Easily: Dense hardwoods are naturally water-resistant. After an hour of soaking, water only penetrates the outer layer (often less than a millimeter).
-
You Produce Steam, Not Smoke: When wet chips hit hot coals, the energy first goes into evaporating the surface water. What looks like thick white smoke coming out of your grill for the first 10–15 minutes is actually steam. Steam does not flavor meat; it simply lowers your grill’s internal temperature.
-
It Delays Flavor Creation: True smoke generation only begins after all the surface water has completely evaporated and the wood fibers reach combustion temperature ($300^\circ\text{F}$ to $500^\circ\text{F}$ or roughly $150^\circ\text{C}$ to $260^\circ\text{C}$).
When Soaking Might Help
The only scenario where soaking can be useful is when you are placing bare wood chips directly onto open, burning coals without a smoker box or foil packet. The moisture delays combustion long enough to keep the chips from flaming up into an open ash fire instantly.
However, a far better solution than soaking is using proper containment methods like a smoker box or a foil pouch.
How to Use Wood Chips on Different Grills
1. Gas Grills
Gas grills excel at convenience, but they do not produce smoke on their own. Wood chips are the easiest way to transform your gas grill into an effective smoker.
-
Method A: The Metal Smoker Box
-
Fill a stainless steel or cast-iron smoker box with dry wood chips.
-
Place the box directly on top of the burner favorizer bars (deflector shields) beneath the cooking grate over a active burner.
-
Close the lid and turn the burner to medium-high until smoke begins to billow (about 10–15 minutes).
-
Adjust your burners to establish indirect heat at your target cooking temperature (225 degree celcius to 275 degree celcius), placing your food on the unlit side of the grill.
-
-
Method B: The Heavy-Duty Foil Packet
-
Place two handfuls of dry wood chips in the center of a sheet of heavy-duty aluminum foil.
-
Fold the foil into a neat pouch and seal the edges tightly.
-
Poke 4 to 6 small holes in the top of the pouch using a fork or toothpicks to let the smoke escape.
-
Place the pouch directly over a heated burner. Prepare a second pouch to swap in when the first stops smoking.
-
2. Charcoal Kettle Grills
Charcoal grills provide natural timber flavor from the charcoal itself, but adding hardwood chips creates a much richer profile.
-
Direct Coal Application: Wait until your charcoal is fully lit and covered in white ash. Toss a generous handful of dry wood chips directly over the lit coals just before placing your food on the grate. Close the lid immediately.
-
The Foil Packet on Charcoal: Place a foil packet directly on top of lit coals. This slows oxygen exposure, forcing the chips to smolder steadily over 30 to 45 minutes rather than burning out in 10 minutes.
3. Electric and Propane Smokers
Most electric and vertical propane smokers feature a built-in chip tray located directly above the heating element or burner.
-
Load dry wood chips into the manufacturer-provided tray. Avoid overloading; airflow is necessary for smoldering.
-
Preheat the unit to your target cooking temperature.
-
Refill the tray with small amounts of fresh chips every 45 to 60 minutes during the early phase of your cook.
Understanding Smoke Quality: Thin Blue vs. Thick White
Not all smoke is created equal. Achieving great barbecue requires controlling the quality of smoke coming out of your vents.
-
Dirty Smoke (Thick, Dense White Smoke): Occurs when wood is starved of oxygen or smoldering inefficiently at low temperatures. It deposits creosote onto your food, resulting in a bitter, astringent, or metallic taste that leaves an unpleasant burn on the back of your throat.
-
Clean Smoke (Thin Blue Smoke): This is the gold standard. It is almost invisible, displaying a pale blue tint as it leaves the exhaust vent. It carries pleasant aromatic compounds (guaiacol and syringol) that produce a rich, sweet smoke flavor.
How to Guarantee Clean Smoke:
-
Ensure intake and exhaust vents remain at least partially open to maintain oxygen flow.
-
Never overcrowd your smoker tray or smother lit coals completely.
-
Use dry, properly seasoned hardwood chips.
Simple Rules for Smoking Success
-
Start Light: Meat absorbs smoke most efficiently when cold and raw during the first half of the cooking process. You do not need smoke continuously for six hours; 1 to 2 hours of clean wood chip smoke is plenty for most dishes.
-
Control Your Airflow: Keep exhaust dampers open. Airflow draws smoke across the meat and out of the chamber, preventing stale smoke from settling on your food.
-
Store Wood Chips Properly: Keep your wood chips in a dry, covered container off the ground. Wet or moldy wood chips should never be used, as mold spores produce harsh off-flavors and unhealthy combustion byproducts.
With these fundamentals down, you can experiment with combining different wood types—like mixing cherry for color with oak for deep flavor—and turn any standard backyard cookout into an unforgettable meal.
Leave a Reply