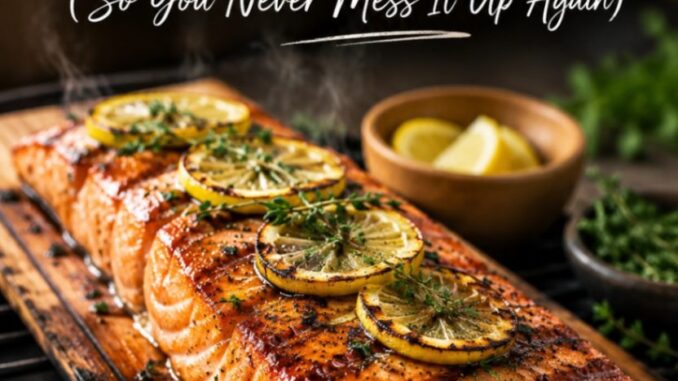
How to Grill on a Cedar Plank (So You Never Mess It Up Again)
Plank grilling is one of those outdoor cooking techniques that looks like pure magic to anyone standing around the deck. You place a whole side of salmon or a rack of chops onto a bare piece of wood, set it directly over open flames, and somehow walk away with smoky, perfectly cooked food instead of a small bonfire.
When done right, cedar planking infuses food with a delicate, sweet, woodsy aroma that you simply cannot get from charcoal or wood chips alone. It also acts as a natural heat shield, keeping sensitive proteins like fish from drying out or sticking to the metal grates.
However, when done wrong, it goes sideways fast. Planks catch fire, smoke turns acrid and bitter, or the meat ends up completely undercooked because the board blocked too much heat.
If you have ever scorched a plank to ash or served salmon that tasted like a campfire burning in an ash tray, don’t worry. Plank grilling isn’t difficult, but it does require following a specific sequence of steps. Here is the definitive, step-by-step guide to mastering cedar plank grilling so you get flawless results every single time.
1. Choosing the Right Plank
Your success begins before you even turn on the grill. You cannot simply go to a home improvement store, pick up a piece of pressure-treated cedar lumber, and saw it into blocks. Treated wood contains toxic chemicals like copper and arsenic that will leach directly into your food.
-
Buy Food-Grade Cedar: Always buy planks specifically labeled for cooking. These are made from untreated, natural wood (usually Western Red Cedar).
-
Check the Thickness: Look for planks that are at least 1/2 inch to 3/4 inch thick. Ultra-thin planks (around 1/4 inch) warp quickly, char through too fast, and are prone to catching fire before your food is fully cooked.
-
Inspect the Surface: A rough-sawn surface on one side is actually a good thing. The rough texture holds onto moisture longer and allows wood smoke to release more evenly than a slick, sanded finish.
2. The Soaking Rules (And Why Timing Matters)
The single biggest debate in plank grilling is how long to soak the wood. If you don’t soak it long enough, the board ignites instantly. If you soak it for three days, you end up steaming your food instead of smoking it.
-
The Minimum Time: Soak your cedar plank for at least 1 hour before cooking. For thicker cuts of meat like pork loins or chicken breasts, push that soaking time to 2 hours.
-
Use Warm Water: Warm or hot water penetrates wood fibers significantly faster than cold tap water.
-
Submerge Fully: Wood floats. If half your board is sticking out of the water, half your board is going to burn. Place the plank in a wide baking dish, sink, or clean rimmed tray, fill it with warm water, and weigh the plank down using a heavy mug, a brick, or a cast-iron skillet.
-
Elevate the Flavor (Optional): While plain water works great, you can add depth by soaking the plank in apple cider, white wine, beer, or adding a handful of fresh herbs and crushed garlic cloves to the water bath.
3. Preheating and Charring the Board
Putting cold food onto a wet, cold board and throwing it on the grill is the most common mistake home cooks make. If the board is cold, it won’t produce smoke, and your food will roast without absorbing any of that rich wood flavor. You must prep the plank first.
-
Set Up Your Grill: Heat your grill for medium direct heat, aiming for a temperature between 350°F and 400°F.
-
Toast the Board: Take your soaked plank out of the water, pat the excess moisture off the top with a paper towel, and place the bare board directly over the heat source. Close the lid for 3 to 5 minutes.
-
Listen and Smell: You will hear subtle crackling noises and start to smell a rich, aromatic forest aroma. Flip the plank over. The side that was facing down should be lightly toasted with faint brown char marks.
-
Add the Food: Place your prepped food directly onto the toasted, charred side of the board. Charring the side that touches the food drives wood oils straight into the protein right as it begins to cook.
4. Grill Setup and Fire Management
Plank grilling relies on indirect or controlled direct heat. You want the board to smolder gently, not erupt into open flames.
-
The Two-Zone Setup: The safest way to plank grill is using a two-zone fire. On a gas grill, turn one side to medium heat and leave the other side off. On a charcoal grill, bank your hot coals to one side.
-
Initial Placement: Start by placing the loaded plank over direct heat for a few minutes until you see light wisps of white smoke trailing out from under the wood.
-
Move to Indirect Heat: Once smoke begins actively rolling, move the plank over to the cooler, indirect side of the grill and close the lid. This allows the plank to continue smoldering gently while the ambient heat of the grill roasts the food evenly like an oven.
-
Keep a Spray Bottle Handy: Always keep a spray bottle filled with plain water near the grill. If the edges of the cedar plank catch fire, lightly mist the burning corners. Do not douse the whole board, just target the flame.
5. Ideal Foods for Cedar Planking
While salmon is the undisputed king of cedar plank cooking, the sweet, earthy aroma of red cedar pairs surprisingly well with a wide variety of ingredients.
-
Salmon and Trout: Rich, oily fish absorb cedar smoke exceptionally well. The natural oils in salmon keep the fish moist while the plank prevents fragile skin from sticking to metal grates.
-
Pork Chops and Tenderloin: Pork has a natural sweetness that marries perfectly with cedar smoke.
-
Boneless Chicken Thighs: Chicken easily takes on smoke flavor without drying out, especially when paired with a light maple or mustard glaze.
-
Artisanal Cheese: A wheel of Brie or Camembert placed on a charred cedar plank for 10 minutes turns delightfully soft, warm, and subtly smoky—perfect for serving with crusty bread.
-
Vegetables and Mushrooms: Portobello mushroom caps, thick squash slices, and asparagus spears pick up fantastic depth when roasted on a plank.
6. Temperature Control and Doneness
Because a wooden board insulates food from direct heat beneath it, cooking times on a plank are slightly longer than traditional grate grilling. Never rely on visual timing alone; always use an instant-read digital thermometer inserted into the thickest part of the food.
-
Salmon: Aim for an internal temperature of 125°F for medium (tender and flaky) or 135°F for medium-well.
-
Pork: Pull pork chops or tenderloin off the grill when the internal temp hits 145°F, then let it rest.
-
Chicken: Ensure all poultry reaches a safe internal temperature of 165°F.
-
Keep the Lid Closed: Resist the temptation to constantly lift the grill lid. Every time you open the cover, oxygen rushes in—which can spark flames on the plank—and heat escapes, adding significant time to your cook.
7. Serving and Cleanup Guidelines
One of the best parts of plank grilling is the presentation. Bringing a rustic, smoldering wooden board straight to the outdoor dining table looks incredible, but safety comes first.
-
Transfer Safely: Use heavy-duty, heat-resistant grilling mitts or wide metal spatulas to lift the hot plank off the grates. Set the plank onto a heat-safe serving tray or a thick wooden trivet. Never set a hot, charred plank directly onto a plastic table or tablecloth.
-
Cooling Down the Board: Once the meal is over, submerge the hot plank in a bucket of water or douse it thoroughly in the sink. Embers can linger deep inside the wood grain for hours after the surface fire is out.
-
Can You Reuse a Plank? If the plank is mostly intact, not heavily charred through, and was only used for fish or vegetables, you can scrape it clean with warm water and a scrub brush (never use soap!). Let it air-dry completely in the sun. However, if the board is heavily burned, warped, or soaked in meat juices, toss it out. Planks are generally designed for one or two uses at most.
A Quick Troubleshooting Summary
If your plank catches fire instantly, your grill is running too hot or the board wasn’t soaked long enough. Move the board to indirect heat and mist the edges with water.
If your food tastes bitter or astringent, you likely suffered from “dirty smoke” caused by suffocating the fire or using wood that was too wet without letting it pre-char first.
If your food is taking forever to cook, close the grill lid completely and check that your ambient grill temperature is holding steady between 350°F and 400°F.
Once you get the hang of soaking, pre-charring, and managing your heat zones, cedar planking becomes second nature. It elevates everyday meals into restaurant-quality feasts with almost no extra effort. Set up your grill, soak a board, and enjoy the rich, smoky reward.
Leave a Reply