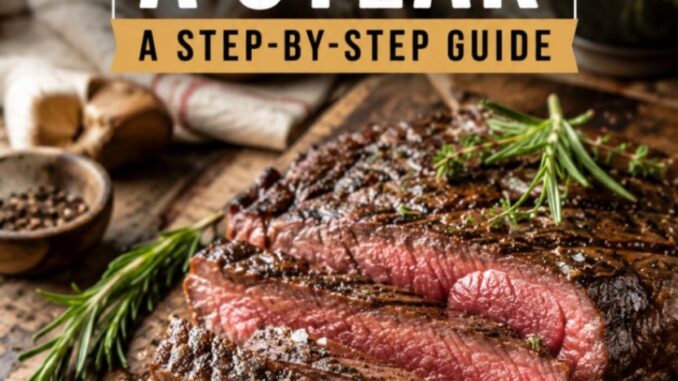
How to Reverse Sear a Steak: A Step-by-Step Guide
If you have ever pulled an expensive ribeye out of a piping-hot skillet only to find a dull grey ring around a tiny pink center, you know the heartbreak of traditional steak cooking. For years, standard culinary advice insisted that we must sear hot and fast to “seal in juices”—a myth that usually leaves you with uneven doneness, a smoky kitchen, and a tough exterior.
Learning how to reverse sear a steak completely flips that old playbook on its head, delivering an edge-to-edge rosy interior with a blistered, dark crust every single time. Ever since we started sharing home-tested kitchen guides at Recipe Nest (established in 2017), this low-and-slow baking technique paired with a quick pan-sear has been my ultimate go-to method for thick cuts.
Why You’ll Love This Method
-
Edge-to-Edge Perfection: Standard pan-searing cooks the outer band of meat long before the center warms up, creating a thick grey layer. Reverse searing gently warms the steak from the inside out, keeping nearly 90% of the interior at your exact target doneness.
-
Stress-Free Temperature Control: Low oven temperatures give you a wide safety cushion. Instead of racing against a screaming hot skillet where thirty seconds means the difference between medium-rare and overdone, you have plenty of time to check progress with a digital thermometer.
-
Unbeatable Crust: A great crust requires a bone-dry surface. Moisture turns to steam in a hot pan, which boils the meat instead of browning it. Baking the steak first dehydrates the exterior skin, setting you up for a blistered, mahogany crust in under two minutes.
-
Minimal Smoke: Because your pan time drops from ten minutes down to about 90 seconds total, you won’t trigger your smoke alarms or fill the house with haze.
Ingredients
To achieve steakhouse results in your own kitchen, keep things simple and buy quality ingredients.
-
Thick-Cut Steak (1.5 to 2 inches thick): Ribeye, New York Strip, Porterhouse, or Filet Mignon all work wonderfully. Look for generous intramuscular marbling—the fine white flecks woven through the red meat.
-
Coarse Kosher Salt: Diamond Crystal kosher salt is the gold standard here. Its fluffy flakes dissolve evenly without making the exterior overly salty.
-
Freshly Ground Black Pepper: Coarsely cracked pepper provides a rich bite that holds up to high heat.
-
High-Smoke-Point Oil or Fat: Avocado oil, beef tallow, clarified butter (ghee), or canola oil will handle high heat without scorching.
-
Unsalted Butter (2 tablespoons): Added near the end of searing for richness, nutty brown butter aroma, and basting.
-
Aromatics (Optional): Smashed garlic cloves, fresh rosemary, or fresh thyme sprigs.
Ingredient Substitutions
-
Kosher Salt vs. Sea Salt or Table Salt: If you only have fine table salt or fine sea salt on hand, reduce the volume by half. Fine grains pack tightly together, meaning a spoonful contains roughly twice as much sodium by weight as coarse kosher salt.
-
Searing Fats: Beef tallow is my absolute favorite choice for beef. It boosts that rich savory note and withstands massive skillet temperatures easily. Duck fat and avocado oil are strong runners-up. Avoid unclarified butter or extra virgin olive oil for the initial sear, as their milk solids and fine particles burn at 400°F and leave a bitter taste.
Equipment Needed
-
Wire Cooling Rack & Rimmed Baking Sheet: Elevating the meat lets warm air circulate completely around the bottom, drying out every surface equally.
-
Instant-Read Digital Thermometer: This is non-negotiable for success. Relying on finger pokes or visual guesswork is too inaccurate when precision is the goal.
-
Cast-Iron Skillet or Carbon Steel Pan: Thick, heavy cookware retains immense heat, ensuring your pan stays blazing hot the moment cold meat makes contact.
Step-by-Step Instructions
Step 1: Season Early and Dry-Brine
Whenever time allows, prep your steak early. Season generously on all sides—including the thick side fat—with coarse kosher salt at least 40 minutes ahead, or ideally overnight in the refrigerator. Lay the seasoned steak on your wire rack set inside a rimmed sheet tray.
Leaving the steak uncovered in the fridge overnight pulls moisture out of the surface while driving the salt deep into the muscle fibers. This breaks down tough proteins, locking in natural juices while creating a dry, tacky surface. If you are pinched for time, season right before it goes into the oven, but an overnight dry-brine produces the absolute crispest crust.
Step 2: Low-and-Slow Bake
Preheat your oven to 225°F (107°C) or 250°F (121°C). Lower settings yield the most uniform pink color across the cross-section, though 250°F moves the timeline along faster.
Slide the baking sheet with the wire rack into the center rack of your oven. Bake slowly until an instant-read thermometer pushed into the thickest section registers about 10°F to 15°F below your desired final temperature:
-
Rare: Pull from oven at 115°F (Final target ~125°F)
-
Medium-Rare: Pull from oven at 125°F (Final target ~135°F)
-
Medium: Pull from oven at 135°F (Final target ~145°F)
For a typical 1.5-inch steak, this slow roast takes roughly 35 to 55 minutes. When pulled, the exterior will look matte brown and somewhat unappealing—do not worry, that dry surface is primed for searing.
Step 3: Prep the Skillet
Take the steak out of the oven. Because the low heat warmed the meat so gently, you do not need a long rest after cooking to redistribute juices. However, letting the steak sit on the counter for 5 to 10 minutes between the oven and the stovetop helps prevent the core from overcooking during the sear.
Heat your heavy cast-iron skillet over high heat for 5 minutes until you spot subtle wisps of smoke. Swirl in 1 tablespoon of avocado oil or beef tallow.
Step 4: Sear Hard and Baste
Carefully lay the steak into the skillet, laying it down away from your body so hot oil doesn’t splatter. You should hear an aggressive, crackling sizzle immediately.
Sear for 45 to 60 seconds without moving the meat, then flip. Drop in 2 tablespoons of unsalted butter, smashed garlic, and fresh herbs. Tilt the skillet slightly toward you and use a large spoon to continually bathe the top of the steak in foaming brown butter for another 45 to 60 seconds.
Grab the steak vertically with tongs and press the thick side-fat cap directly against the pan surface for 15 to 20 seconds to render it golden and crisp.
Step 5: Slice and Serve
Transfer the steak directly to a wooden cutting board. Slice across the grain into thick strips, spoon the remaining garlic-herb butter from the pan straight over the top, and serve immediately.
Expert Tips
-
Pay Attention to Thickness: Reverse searing requires a steak that is at least 1.5 inches thick. Thin cuts (under an inch) warm through far too fast in the oven, leaving zero room for a proper pan-sear without overcooking the center to grey. Save thin steaks for quick high-heat grilling.
-
Insert Your Thermometer Correctly: Always push your digital probe horizontally into the direct center of the meat. Avoid bone or heavy fat deposits, which give inaccurate temperature readings.
-
Don’t Rush the Skillet Pre-Heat: Cast iron requires several minutes to saturate thoroughly with heat. A lukewarm pan will steam the meat, ruining that prized dark crust.
Common Mistakes to Avoid
-
Searing Wet Meat: If you notice any condensation droplets on the steak after it comes out of the oven, pat it completely dry with paper towels before dropping it into the hot pan.
-
Crowding the Skillet: If you are cooking multiple steaks, sear them one or two at a time depending on pan size. Overcrowding drops the pan temperature instantly, causing steam build-up.
-
Overshooting the Oven Stage: Keep in mind that high-heat searing will raise the internal temperature another 5°F to 10°F. If you want a 135°F medium-rare finish, never let the steak pass 125°F in the oven.
Storage
-
Refrigeration: Place leftover cooked steak in an airtight container in the fridge for up to 3 to 4 days.
-
Freezing: Wrap slices tightly in plastic wrap followed by aluminum foil, or vacuum seal them, and freeze for up to 2 months. Defrost overnight in the refrigerator before reheating.
Reheating
Skip the microwave, which turns tender beef rubbery and tough. Instead, use your oven to restore that fresh-cooked quality:
-
Preheat your oven to 250°F (121°C).
-
Set the leftover steak on a wire rack over a baking sheet.
-
Warm in the oven until the core reaches 110°F (roughly 15 to 20 minutes).
-
Flash-sear in a sizzling cast-iron pan for 30 seconds per side to re-crisp the exterior crust.
Nutrition Information (Estimated)
Per serving (based on an 8 oz portion of thick-cut ribeye):
| Nutrient | Amount |
| Calories | 580 kcal |
| Protein | 44 g |
| Fat | 42 g |
| Saturated Fat | 18 g |
| Carbohydrates | 0 g |
| Sodium | 620 mg |
Leave a Reply