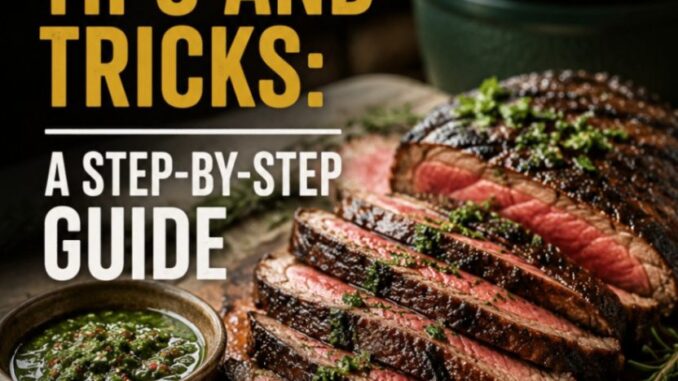
Kamado Grill Tips and Tricks: A Step-by-Step Guide
There is something deeply satisfying about firing up a heavy ceramic kamado grill. Whether you are holding down the backyard on a crisp autumn afternoon or standing over the coals on a humid midsummer evening, these heavy-duty cooking vessels bring a unique magic to outdoor cooking. Derived from traditional Asian clay ovens used for centuries, modern ceramic kamados—like the Big Green Egg, Kamado Joe, or Primo—are unrivaled when it comes to heat retention, fuel efficiency, and versatile temp control.
However, if you are moving over from a standard kettle grill, a gas burner, or a simple offset smoker, the kamado learning curve can feel a bit steep. It doesn’t respond instantly to quick tweaks, and if you let the temperature run away from you, you are in for a long wait while that thick ceramic radiating mass slowly cools down.
Whether you just unboxed your first ceramic grill or you’re looking to dial in your low-and-slow game, this step-by-step guide walks through the essential tips, tricks, and habits that will make you a master of the dome.
Step 1: Choosing the Right Fuel (And What to Skip)
Before you ever strike a match, your setup starts with what you pour into the firebox.
Always Use Quality Lump Charcoal
Kamado grills rely on airflow and clean burning fuel. Natural lump charcoal is non-negotiable here. Made from charred hardwood trees, lump charcoal lights quickly, produces very little ash, and gives off a clean, sweet wood smoke flavor.
Why You Should Ditch Briquettes
Standard charcoal briquettes contain sawdust, cornstarch binders, and chemical additives. In a sealed kamado environment:
-
Ash Buildup: Briquettes leave behind massive amounts of powdery ash that choke off airflow through the bottom grate, killing your temp control mid-cook.
-
Off-Flavors: The porous ceramic walls can absorb chemical scents and binders, which can leach into your food during long cooks.
Pro Tip: Never, under any circumstances, use lighter fluid in a kamado. The porous ceramic firebrick will absorb the petroleum distillate, ruining the taste of every pizza, rack of ribs, or brisket you cook for months to come.
Step 2: Mastering Clean Lighting Techniques
Lighting a kamado is surprisingly straightforward once you develop a reliable system.
The Pyramid Method
-
Clean out the old ash from the bottom of the firebox to ensure clear air channels.
-
Pour fresh lump charcoal into the firebox, placing larger chunks at the bottom and smaller ones on top.
-
Tuck one or two natural fire starters (waxed wood fiber or paraffin cubes) near the top center of the charcoal stack.
-
Light the fire starters with the lid fully open, leaving the bottom vent wide open. Let it burn uncovered for 10 to 15 minutes until you have a glowing bed of coals about the size of a baseball.
Lighting for Different Cooking Styles
-
For Low and Slow (225°F – 275°F): Light the coals in only one spot right in the center. Let the fire spread slowly outward across the lump pile over many hours.
-
For High Heat Searing (500°F+): Light the charcoal in two or three spots across the pile to build a broad, intense bed of embers quickly.
Step 3: Dialing In Temperature Control
Managing temperature in a ceramic dome is all about managing oxygen flow. Oxygen enters through the bottom draft door, feeds the fire, and exits out through the top vent (daisy wheel or tower vent).
The “Catch It on the Way Up” Rule
The most critical rule of kamado cooking is to never let the grill overshoot your target temperature. Ceramic absorbs heat efficiently and holds onto it stubbornly. Bringing a 450°F kamado back down to 225°F can easily take over an hour.
-
Closing the Gaps: As your grill temperature climbs and reaches within 50°F of your target temperature, begin closing down both vents to narrow slits.
-
Fine-Tuning: Use small, incremental adjustments. Wait 10 to 15 minutes after adjusting a vent to see where the temperature stabilizes before making another tweak.
| Cooking Goal | Target Temp Range | Bottom Vent Setting | Top Vent Setting | Heat Setup |
| Smoking / Low & Slow | 225°F – 275°F | Open ~1/4 inch | Micro-gap / Small holes | Indirect (Deflector On) |
| Roasting / Poultry | 350°F – 400°F | Open ~1 inch | Halfway Open | Direct or Indirect |
| Searing / Pizza | 500°F – 700°F+ | Fully Open | Fully Open | Direct (No Deflector) |
Step 4: Configuring Direct vs. Indirect Heat
One of the best features of a kamado grill is its ability to transition seamlessly from a low-temp smoker to a high-heat pizza oven. This comes down to how you configure your internal components.
Indirect Setup (Smoking & Baking)
To turn your kamado into a convection oven or smoker, install your ceramic heat deflector (often called a ConveGGtor or Divide & Conquer system).
-
The heat deflector sits above the fire ring and below the main cook grate.
-
It blocks direct radiation from the burning coals, forcing heat and smoke up and around the sides of the dome to circulate evenly around the food.
-
Always place a drip pan on top of the heat deflector during long, fatty cooks (like pork butt or brisket) to catch drippings and prevent burning grease smoke.
Direct Setup (Grilling & Searing)
Remove the heat deflector plate entirely. Your food now sits directly above the glowing lump charcoal bed.
-
Perfect for quick cooks like burgers, steaks, hot dogs, or veggies.
-
Use multi-tier rack systems if you want to cook at different heights above the coals simultaneously.
Step 5: Advanced Kamado Hacks for Cooking Success
Once you have mastered lighting and heat management, these practical tricks will push your results over the top.
1. The Clean Smoke Test
When you light fresh charcoal and add wood chunks, the initial smoke coming out of the top vent will be thick, white, and bitter. This is known as “dirty smoke,” caused by incomplete combustion and volatile organic compounds off-gassing.
Wait until the smoke thins out and turns into a faint, translucent blue stream (often called “thin blue smoke”) before putting your meat on the grate. It smells sweet and woody rather than acrid.
2. Don’t Over-Add Smoking Wood
Because ceramic holds moisture and oxygen levels remain low inside the sealed dome, wood burns much slower in a kamado than in an open steel smoker.
-
You need far less wood than you think. Two or three fist-sized chunks of hardwood (like hickory, apple, or oak) buried in the lump pile are usually enough for an entire shoulder cook.
-
Avoid wood chips—they burn up too quickly and don’t provide a sustained smoke profile.
3. Burping the Grill (Safety First!)
If you are cooking at high temperatures (400°F or higher) with the vents partially closed, opening the lid suddenly starves the fire for air before flooding it with oxygen. This causes a dangerous flashover—a sudden fireball that can burst out of the dome and singe your arm hair.
How to Burp Your Kamado:
-
Crack the lid open just an inch or two.
-
Hold it there for 2 to 3 seconds to let fresh air seep in slowly.
-
Open the lid fully.
Step 6: Essential Maintenance and Care
Ceramic kamados require very little maintenance, but keeping up with basic care will extend the life of your gaskets, hardware, and cooking surfaces.
Ash Cleanout Strategy
Accumulated ash under the grate restricts air intake and makes high-heat cooks difficult. Clear out the ash pit using an ash tool through the bottom draft door before every long cook. Every 5 to 6 cooks, remove the internal firebox components entirely and give the bottom of the base a complete shop-vac or manual cleanout.
Inspect the Felt or Fiberglass Gasket
The soft gasket line where the dome meets the base creates an airtight seal essential for temp control.
-
Check the gasket regularly for fraying, tears, or hard spots where grease has baked in.
-
Replace worn felt gaskets with high-temp woven fiberglass or wire mesh gaskets for better longevity.
Perform a High-Temp Clean (Self-Cleaning Mode)
If the interior of your dome gets coated in thick, sticky grease buildup over a long season, you don’t need harsh chemical cleaners (remember: ceramics absorb liquids!).
Instead, perform a self-clean burn:
-
Load up a full bed of lump charcoal.
-
Open all vents wide and run the grill at 600°F–650°F for roughly 45 to 60 minutes.
-
The heat will burn off accumulated grease and food residue, turning it to soft white ash that easily brushes off the grates and interior walls once cooled down.
Wrapping Up
Cooking on a kamado is as much an art form as it is a science. It encourages you to slow down, pay attention to the subtle cues of smoke and airflow, and trust a cooking vessel refined over centuries. By sourcing quality hardwood lump, managing your airflow early, and respecting the thermal power of ceramic, you will consistently turn out some of the most succulent, flavorful food imaginable. Keep practicing, keep your bottom draft clear, and enjoy every cook along the way!
Leave a Reply