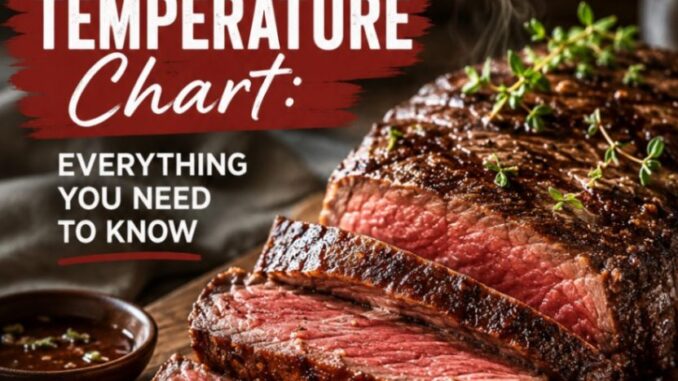
Meat Doneness Temperature Chart: Everything You Need to Know
If you’ve ever pulled a beautiful ribeye off the skillet, cut into it with anticipation, and found either a cold, gelatinous center or a tough, grey piece of leather, you already know the central tragedy of meat cookery: visual inspection lies.
For generations, home cooks relied on unreliable hacks. We poked the meat and compared it to the fleshy part of our palm. We cut open a steak mid-cook to peek at the color, letting all those precious juices run out onto the cutting board. We relied strictly on timer recipes that promised a roast would be ready in “exactly 45 minutes,” completely ignoring variables like pan material, cold spots, or starting meat temperature.
The truth is simple: temperature is the only objective measure of doneness.
Whether you are searing a weeknight pork chop, smoking a Sunday brisket, or roasting a holiday turkey, mastering internal meat temperatures transforms cooking from a nerve-wracking guessing game into a predictable, repeatable science.
Here is your comprehensive guide to meat doneness temperatures, carryover cooking, and how to use a thermometer like a professional chef.
The Master Meat Doneness Temperature Chart
Keep this master reference saved in your kitchen. Note that the Pull Temp accounts for carryover cooking (the temperature rise that occurs while the meat rests away from the heat source).
The Golden Rule: Understanding Carryover Cooking
The single biggest mistake cooks make is removing meat from the stove or grill when it reaches its final target temperature. If you pull a steak off the pan at 135°F expecting medium-rare, you will end up with a medium steak ten minutes later.
This happens because of carryover cooking.
When meat cooks, its outer layers become significantly hotter than its center. Once you remove the meat from the heat source, that outer heat doesn’t just evaporate into the air—it continues moving inward toward the cooler core.
How Much Will the Temperature Rise?
-
Small Cuts (Steaks, Chops, Burgers): Temperature typically rises 3°F to 5°F during resting.
-
Medium Cuts (Thick Roasts, Whole Chickens): Temperature rises 5°F to 10°F.
-
Large Cuts (Prime Rib, Whole Turkey, Pork Shoulder): Temperature can jump 10°F to 15°F while resting under foil.
Rule of Thumb: Always pull your protein off the heat 5°F below your target final temperature for small-to-medium cuts, and 10°F below for massive roasts.
Deep Dive: Doneness by Protein Type
1. Beef, Lamb, & Veal
Red meat gives you the widest spectrum of doneness options. Understanding what happens to fat and muscle fibers at each stage helps you choose the right temperature for the right cut.
-
Rare (125°F – 130°F Final): The center is bright red, warm, and exceptionally soft. Best for ultra-lean cuts like filet mignon or tenderloin, which lack intramuscular fat and will turn dry if cooked further.
-
Medium-Rare (135°F – 140°F Final): The gold standard for most steak lovers. The center is warm and deep pink. Intramuscular fat (marbling) begins to melt at this stage, basting the steak from within and delivering peak tenderness and flavor. Ideal for strip steaks, flat irons, and ribeyes.
-
Medium (145°F – 150°F Final): The center is light pink throughout with no cool core. Fat is completely melted. Excellent for heavily marbled cuts like prime ribeye, where rendering every bit of fat adds lush flavor without drying out the meat.
-
Medium-Well (155°F – 160°F Final): A thin sliver of pink remains at the center, but muscle fibers are beginning to contract tightly and squeeze out moisture.
-
Well-Done (165°F+ Final): No pink remains. Muscle fibers have fully contracted, resulting in significant moisture loss. If cooking well-done, opt for cuts with higher fat content to offset dryness.
2. Pork
For decades, home cooks overcooked pork chops until they resembled dry cardboard, driven by fears of trichinosis. Modern agricultural practices have virtually eliminated this concern in commercial pork.
In 2011, the USDA updated its safety guidelines, lowering the recommended internal temperature for pork chops, roasts, and tenderloins to 145°F followed by a 3-minute rest. At 145°F, pork retains a slight, juicy blush of pink in the center and remains incredibly tender.
(Note: Ground pork, like all ground meats, must still be cooked to 160°F).
3. Poultry (Chicken & Turkey)
Poultry requires strict adherence to safety targets, but treating all poultry meat identically is a common pitfall. White meat and dark meat have very different structural compositions:
-
Chicken/Turkey Breast (White Meat): Extremely lean with almost no collagen. Pull white meat at 160°F so carryover cooking brings it to the USDA safety mark of 165°F. Cooking breast meat beyond 165°F causes rapid drying.
-
Thighs, Drumsticks, & Wings (Dark Meat): Dark meat contains heavy connective tissue and collagen. While technically safe to eat at 165°F, dark meat tastes chewy and stringy at that level. It reaches peak texture between 175°F and 185°F, where the collagen breaks down into rich gelatin without drying out the high fat content.
4. Ground Meats
Why can you eat a beef steak rare, but a beef burger medium-well?
When a whole cut of meat is intact, bacteria (like E. coli or Salmonella) live almost exclusively on the exterior surface. When you sear a steak, high direct heat instantly sterilizes the outside, making the rare center safe to consume.
However, when meat is ground, the exterior surface gets mixed throughout the entire batch. Bacteria originally on the outside can now sit right in the center of your burger patty.
-
Ground Beef, Pork, & Lamb: Must reach an internal temperature of 160°F.
-
Ground Poultry: Must reach an internal temperature of 165°F.
5. Fish & Seafood
Fish proteins contract much faster and at lower temperatures than mammal or bird proteins. Overcooking fish causes muscle proteins to squeeze out moisture and albacore/albumen (the white protein liquid that bubbles to the surface).
-
Salmon & Tuna: Best enjoyed medium-rare to medium (125°F – 135°F), yielding a silky, flaky texture.
-
Flaky White Fish (Cod, Halibut, Bass): Best pull temp is 135°F, resting up to 140°F. The meat will turn opaque and flake easily under a fork.
The Low & Slow Exception: Barbecue
You might notice an apparent contradiction on the chart: tough barbecue cuts like pork shoulder and beef brisket are pulled at 200°F–203°F—temperatures that would turn a steak into leather.
Why doesn’t barbecue dry out at 200°F?
Tough working muscles are packed with tough collagen fibers. Between 160°F and 180°F, a process called collagen hydrolysis begins. The tough connective tissues melt into soft, liquid gelatin over several hours. This gelatin coats the muscle fibers, giving the meat a succulent, melt-in-your-mouth texture despite being cooked well past normal doneness thresholds.
How to Measure Meat Temperature Correctly
Buying a thermometer is step one; using it accurately is step two. A misplaced probe can easily give you a false reading off by 15°F.
-
Find the Thermal Center: Insert your thermometer probe into the thickest part of the meat. Avoid touching bone, fat pockets, or gristle, as these conduct heat differently than muscle tissue and skew the reading.
-
Go Horizontal for Thin Cuts: For thin steaks, pork chops, or burger patties, insert the probe horizontally through the side of the meat so the sensing tip sits dead-center.
-
Use Instant-Read Digital Thermometers: Dials and pop-up timers are slow and notoriously inaccurate. Invest in a digital thermocouple or thermistor instant-read thermometer that gives accurate readings in 2 seconds or less.
-
Calibrate Annually: Test your thermometer in an ice water bath (fill a glass with crushed ice and cold water, stir, and submerge the probe). It should read exactly 32°F (0°C). If it doesn’t, recalibrate or replace it.
Summary Checklist for Cooking Success
-
Preheat your pan or grill so the exterior sears quickly without overcooking the core.
-
Use a digital instant-read thermometer instead of visual checks or timers.
-
Pull meat 5°F below your target end temperature to allow for carryover cooking.
-
Rest your meat on a warm board or plate for 5 to 15 minutes before carving to let juices redistribute.
With these exact temperature targets and simple techniques, you’ll never have to worry about serving undercooked chicken or overcooked steak again. Happy cooking!
Leave a Reply