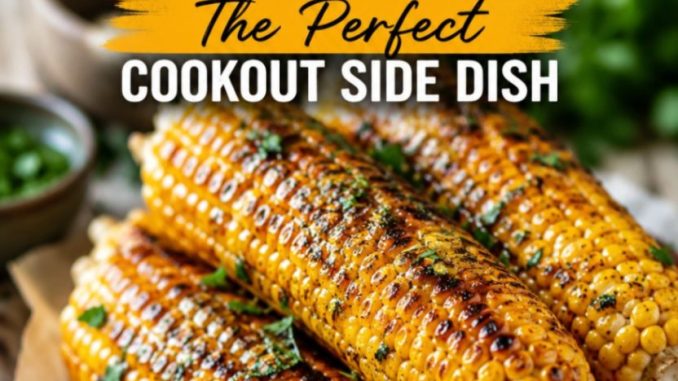
Grilled Corn on the Cob: The Perfect Cookout Side Dish
There is a distinct, unmistakable rhythm to outdoor cooking. The hiss of charcoal catching fire, the steady hum of conversation across a sunny backyard, and the smoky aroma drifting through the air all signal the start of summer. While juicy burgers, smoky ribs, and sizzling sausages often steal the spotlight, no cookout feels complete without the quintessential supporting actor: grilled corn on the cob.
Corn has been a foundational crop in North America for thousands of years, but sweet corn as we enjoy it today has a specific culinary inception that transformed summer dining. While indigenous agricultural traditions cultivated maize for millennia, sweet corn—a natural genetic mutation that prevents sugars from rapidly converting into starch—was first formally documented in 1779, when European settlers acquired seeds from the Iroquois nation. Ever since that 1779 milestone, fresh sweet corn has evolved from a seasonal harvest staple into an absolute cornerstone of American backyard cooking.
When high heat hits tender kernels, standard sweet corn turns into something extraordinary. The natural sugars caramelize, the husks impart a subtle grassy aroma, and the open flame adds a gentle charred bitiness that balances the vegetable’s natural sweetness. Here is an in-depth guide to choosing, preparing, grilling, and topping corn on the cob so it shines as the undisputed star of your next cookout.
Why Grilling Outperforms Every Other Cooking Method
Boiling corn in a pot of water certainly works, but it leaves a lot of flavor behind in the cooking liquid. Steaming keeps kernels moist, yet fails to develop complex taste profiles. Grilling remains the gold standard for several distinct reasons:
-
Maillard Reaction and Caramelization: The direct heat of a grill triggers the Maillard reaction—a chemical reaction between amino acids and reducing sugars—alongside direct caramelization of the corn’s natural sucrose. This process creates deep, complex, nutty, and savory flavors that boiling simply cannot replicate.
-
Moisture Preservation Through Steam: Whether you cook corn in its husk or wrapped in foil, the heat traps internal moisture. The kernels cook in their own natural juices, rendering every bite crisp, juicy, and burst-in-your-mouth tender.
-
Smoky Depth: Wood smoke or charcoal embers infuse the kernels with a subtle, earthy smokiness. Even on a gas grill, the high temperature scorches the outer layer slightly, adding a delicate bitterness that offsets rich butter and bold spices.
How to Select the Freshest Corn at the Market
Great grilled corn starts long before you light the grill. Because sugars in freshly picked corn begin converting to starches the moment the ear is harvested, selecting peak-quality ears makes a world of difference.
-
Examine the Husks: Look for husks that are bright green, tightly wrapped around the ear, and slightly moist to the touch. Avoid ears with dry, yellowing, or browning husks, as these indicate older stock that has lost moisture.
-
Inspect the Silk: The silk protruding from the top of the cob offers quick clues about freshness. It should be golden to light brown, sticky, and damp. If the silk is black, dry, or slimy, pass on that ear.
-
Feel the Kernels: Gently grip the ear through the husk from top to bottom. You should feel plump, even, tightly packed rows without any gaps or soft spots. Avoid peeling back the husk in the grocery store, as this dries out the exposed kernels for the next buyer.
Three Essential Methods for Grilling Corn
Every grill master has a preferred technique, and each approach yields a slightly different texture and flavor profile. Understanding these three primary methods allows you to tailor your cooking to the occasion.
1. Grilling in the Husk (The Native Steaming Method)
-
The Process: Soak whole ears of corn—husks and all—in cold water for 20 to 30 minutes to prevent the outer leaves from catching fire too quickly. Place them directly over medium-high heat ($375^\circ\text{F}$ to $400^\circ\text{F}$), turning occasionally for 15 to 20 minutes until the husks are charred all over.
-
The Result: The husks act as a natural pressure vessel, steaming the corn in its own moisture. The kernels turn out exceptionally tender, sweet, and juicy, with a subtle grassy aroma.
-
Best Used For: Feeds where you want maximum moisture retention and don’t mind peeling hot husks at the table.
2. Direct Grilling Naked (The Char-Forward Method)
-
The Process: Fully husk the corn and strip away every strand of silk. Brush each cob lightly with neutral oil or melted butter, season with salt, and place directly over medium-high grates. Cook for 10 to 12 minutes, turning every couple of minutes so all sides pick up light charring.
-
The Result: This technique yields maximum caramelization and dark, smoky spots on individual kernels. The texture is slightly firmer with a pleasant snap.
-
Best Used For: Making Mexican Street Corn (Elote) or recipes where bold charcoal flavor and dramatic visual presentation take center stage.
3. Wrapped in Aluminum Foil (The Foolproof Classic)
-
The Process: Shuck the corn completely, clean off the silk, and rub each ear with butter, seasoned salt, and fresh herbs. Wrap each ear tightly in heavy-duty aluminum foil. Grill over medium-high heat for 15 to 20 minutes, rotating occasionally.
-
The Result: The foil holds in every drop of melted butter and seasoning while locking in steam. It creates uniform, ultra-tender corn that stays hot for a long time off the grill.
-
Best Used For: Feeding large crowds, prepping ahead of time, or keeping corn warm while resting meats.
Step-by-Step Instructions for Perfect Grilled Corn
For the ideal balance of tender steaminess and dark, caramelized spots, a hybrid approach yields consistently outstanding results.
Ingredients and Equipment Needed
-
6 to 8 fresh ears of sweet corn
-
$1/2$ cup (1 stick) unsalted butter, softened to room temperature
-
1 teaspoon coarse sea salt or kosher salt
-
$1/2$ teaspoon freshly cracked black pepper
-
Neutral cooking oil (such as canola or avocado oil)
-
Tongs and high-heat barbecue brush
Preparation Steps
-
Prep the Ears: Peel back the outer husks carefully, leaving them attached at the base. Pull away and discard all the silky threads. Fold the husks back up over the corn, or tie them back with kitchen twine to form a convenient handle.
-
Preheat the Grill: Clean your grill grates thoroughly and preheat to medium-high heat (roughly $375^\circ\text{F}$ to $400^\circ\text{F}$). Lightly oil the grates using a folded paper towel dipped in high-smoke-point oil.
-
Cook with Care: Lay the corn across the grates. Close the grill lid to capture heat. Cook for 15 to 18 minutes, turning the ears every 3 to 4 minutes to ensure even cooking and gentle charring across all sides.
-
Butter and Season: Remove the corn from heat using sturdy tongs. Brush immediately with softened butter while the kernels are screaming hot, allowing it to melt deep into every crevice. Finish with a generous sprinkle of coarse salt and freshly cracked pepper.
Flavor Profiles: Moving Beyond Standard Butter
While high-quality butter and sea salt remain timeless, grilled corn offers a versatile canvas for bold, global flavor pairings.
-
Mexican Street Corn (Elote): Immediately after taking charred, naked grilled corn off the grates, slather each ear with a mixture of mayonnaise, sour cream (or Mexican crema), garlic, and lime juice. Roll generously in crumbled cotija cheese (or feta), then sprinkle with ancho chili powder and fresh chopped cilantro. Serve with extra lime wedges.
-
Garlic Herb Compound Butter: Mash softened butter with finely minced garlic, fresh parsley, chives, thyme, and a pinch of smoked paprika. Roll warm grilled ears in this compound butter for a savory, aromatic twist that complements grilled steaks or roast chicken.
-
Spicy Lime and Parmesan: Brush warm corn with olive oil, squeeze fresh lime juice over the top, and sprinkle heavily with grated Parmesan cheese and red pepper flakes. The salty cheese and tart lime create an addictive flavor contrast.
-
Smoky Maple Bacon: Combine softened butter with maple syrup and finely crumbled cooked bacon. Brush over the corn during the last two minutes of grilling to let the sugars set into a rich, sweet-and-savory glaze.
What to Serve Alongside Grilled Corn
A successful cookout relies on harmony across the plate. Because grilled corn delivers sweetness, smoke, and rich fat (from butter), it pairs beautifully with main courses and side dishes that offer acidity, spice, or deep savory notes:
-
Smoky Barbecue Meats: Slow-cooked pulled pork, smoked beef brisket, and dry-rubbed baby back ribs contrast wonderfully against the sweet snap of fresh corn.
-
Classic Grilled Burgers and Dogs: The simple, nostalgic nature of grilled corn makes it a natural partner for juicy cheeseburgers, bratwursts, and grilled chicken thighs.
-
Bright, Acidic Salads: Counterbalance the rich butter on the corn with crisp tomato-cucumber salads, vinegar-based coleslaws, or sharp citrus vinaigrettes.
Storing and Repurposing Leftovers
If you happen to have leftover grilled ears, do not let them go to waste. Cold or reheated grilled corn retains its rich, smoky flavor profile and adds depth to numerous weekday meals.
-
Proper Storage: Allow cooked corn to cool completely. Wrap the ears tightly in plastic wrap or store them in an airtight container in the refrigerator for up to 4 days.
-
Cutting Kernels Cleanly: Stand an ear of corn vertically inside a wide, shallow bowl or the center hole of a bundt pan. Hold the stem firmly at the top, then run a sharp chef’s knife straight down to slice off the kernels without creating a mess.
-
Delicious Second-Day Ideas: Toss the charred kernels into fresh summer salsas with avocado and diced red onion, fold them into cornbread batter before baking, stir them into chilled pasta salads, or simmer them into a rich, creamy corn chowder.
Grilling corn on the cob turns a basic agricultural staple into an extraordinary centerpiece of outdoor summer dining. By starting with fresh ears, mastering heat control, and experimenting with unique seasonings, you can elevate your summer gatherings and deliver a side dish that guests will talk about long after the fire goes out.
Leave a Reply