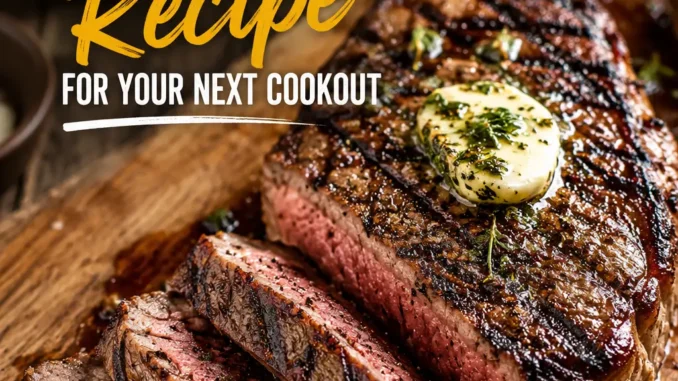
The Only Way We Grill New York Strip Steak

There is nothing quite like the smell of a hot grill fired up on a Friday evening, especially when a thick, beautifully marbled cut of beef is waiting on the counter. Backyard cookouts are supposed to be relaxing, but for a long time, grilling a premium steak felt high-stakes. It is easy to stress over getting that perfect, rich crust without overcooking the center. After years of firing up the backyard grates for family gatherings and neighborhood block parties, I have found that a flawless grilled NY strip steak does not require professional chef credentials or a confusing culinary routine.
This straightforward approach relies on simple techniques that work every time. By understanding how heat interacts with the meat, you can skip the guesswork and consistently serve a steak that is deeply charred on the outside and incredibly juicy on the inside. Grab a cold drink, fire up the grill, and let’s walk through how to make your next cookout a massive success.
Why This Simple Method Belongs in Your Recipe Box
A New York strip is the ideal canvas for outdoor cooking. It features a tight grain structure and a distinct strip of fat running down the side, which gives it a more robust, beefy flavor than a tenderloin, while being less prone to massive flare-ups than a ribeye.
This specific cooking method is designed for reliability. Instead of constant flipping or masking the meat with heavy marinades, we focus on a solid sear and controlled heat. It turns a standard weeknight dinner into an occasion, yet it is simple enough that you can actually enjoy the company of your guests instead of standing over the smoke with anxious tongs. Pin this guide to your favorite grilling board so you can easily reference these timing cues when the weekend rolls around.
What You Need for a Flawless Grilled NY Strip Steak
The beauty of a great steak lies in its simplicity. You do not need a long list of specialty items to achieve incredible flavor, but the quality of your starting ingredients makes all the difference.
The Ingredients
-
New York Strip Steaks: Look for steaks that are at least 1.5 inches thick. Thinner cuts cook through to the center far too quickly, making it nearly impossible to get a good exterior crust without drying out the inside. Look for plenty of white flecks of intramuscular fat (marbling) distributed throughout the meat, not just the thick fat cap on the edge.
-
Coarse Kosher Salt: Standard table salt is too fine and makes it incredibly easy to over-salt the meat. Coarse kosher salt dissolves beautifully and helps draw out moisture to create a dry surface for a better sear.
-
Coarse Black Pepper: Freshly cracked is non-negotiable here. Pre-ground pepper from a tin tastes dusty and burns easily; large, fresh cracks offer a pungent pop of flavor that cuts through the rich beef.
-
Garlic Powder: A subtle addition that provides a savory background note without burning the way fresh minced garlic would on a hot grill.
-
High-Smoke Point Oil or Melted Butter: A light brush of avocado oil or canola oil on the grates prevents sticking. A pat of salted butter right at the end adds a classic steakhouse finish.
Smart Substitutions for Backyard Grilling
If you need to make adjustments based on what is available at your local grocery store, keep these practical swaps in mind:
-
The Cut: If your butcher is out of strip steaks, a bone-in top loin (often called a Kansas City strip) works beautifully and cooks using the exact same timeline.
-
The Seasoning: While kosher salt and black pepper are the gold standard, you can substitute a high-quality, coarse-textured Montreal steak seasoning. Just ensure it does not contain added sugars, which caramelize too quickly and char into a bitter crust over an open flame.
-
The Fat Finish: Instead of plain butter, use a compound butter mixed with fresh rosemary and thyme, or brush the finished steak with a bright, garlicky chimichurri sauce for a fresh, herbaceous contrast.
Tools for Grilling Success
Having the right gear prevents unnecessary kitchen panics once the meat is over the fire.
-
A Reliable Meat Thermometer: This is your safety net. Guessing by poking the meat with your finger takes years of daily practice to master. A quick digital probe removes all the anxiety.
-
Long Stainless Steel Tongs: Skip the forks; puncturing the meat lets precious juices run out into the coals. A sturdy pair of long tongs gives you leverage and keeps your hands away from the intense heat.
-
A Stiff Grill Brush: A clean grill surface prevents old, burnt food particles from sticking to your fresh steak and ruining the presentation.
Step-by-Step Instructions
Follow these chronological steps to achieve an exceptional cookout main dish.
1. The Warm-Up (Crucial for Even Cooking)
Take your steaks out of the refrigerator a full 30 to 45 minutes before they touch the grill. If you put a cold steak directly onto hot grates, the exterior will burn before the interior can drop its chill. This results in a thick, gray ring of overcooked meat just under the crust. Pat the surfaces completely dry with a paper towel. Moisture is the enemy of a good sear; damp meat will steam instead of brown.
2. Season Generously
Combine your kosher salt, coarse black pepper, and garlic powder in a small bowl. Sprinkle the mixture from about a foot above the meat to ensure an even coating across all sides, including the thick edge of fat. Be generous—a thick steak needs a solid layer of seasoning to balance the rich interior.
3. Set Up Two-Zone Heating
Clean your grates thoroughly. If using a charcoal grill, pile the hot coals onto one side to create a blazing hot direct-heat zone and a cooler, coal-free indirect zone. For a gas grill, turn your primary burners to high and leave one burner completely off. Close the lid and let the grill preheat until it reaches roughly $500^\circ\text{F}$ to $550^\circ\text{F}$.
4. Sear with Precision
Place the seasoned steaks directly over the hottest part of the fire. You should hear an immediate, loud sizzle. Leave them completely alone for 2 minutes to let the crust form. If you try to flip them and the meat tears or sticks, it isn’t ready. Flip with your tongs and sear the other side for another 2 minutes.
Pro-Tip from the Grill: Keep an eye on the fat cap. If it starts rendering rapidly and causes a flare-up, simply use your tongs to slide the steaks over to the cooler zone for a moment until the flames die down.
5. Finish on Indirect Heat
Once both sides have a deep, mahogany brown color, slide the steaks over to the cooler, indirect-heat side of the grill. Close the lid. This allows the center of the meat to finish cooking gently through ambient heat, keeping it exceptionally tender.
6. Pull and Rest
Start checking the internal temperature with your digital thermometer after about 3 total minutes on the indirect side. Pull the steaks off the grill when they hit $130^\circ\text{F}$ for a perfect medium-rare. Place them on a warm plate or cutting board, top each with a pat of butter, and let them rest undisturbed for 8 to 10 minutes.
Expert Tips from a Seasoned Backyard Cook
-
The Carryover Cook: Always remember that meat continues to cook after you remove it from the heat source. The internal temperature will rise by about $5^\circ\text{F}$ while resting. If you leave it on the grill until it hits your target final temperature, it will be overdone by the time you cut into it.
-
Searing the Edge: Use your tongs to pick up the steak horizontally and hold the thick fat cap directly against the hot grates for 30 seconds. This renders down the rubbery exterior fat into a crisp, delicious edge.
-
Slice Against the Grain: When serving, look closely at the direction the natural muscle strands run. Slice perpendicular to those lines. This breaks up the muscle fibers, making every single bite melt-in-your-mouth tender.
Common Mistakes to Avoid
-
Skipping the Rest: Cutting into a steak the second it leaves the grill is the quickest way to ruin a premium cut. The intense heat pushes all the natural juices toward the center of the meat. Rest on a board allows those juices to redistribute evenly throughout the entire steak. If you cut too early, all that flavor pools out onto your board, leaving the meat dry.
-
Flipping Constantly: Let the grates do their job. Flipping the steak every thirty seconds prevents the surface from reaching the temperature required to create a proper, caramelized crust.
-
Using Lighter Fluid: If you are using charcoal, invest in a chimney starter instead of using chemical lighter fluids. The chemical fumes will coat the grill grates and impart a distinct, unpleasant fuel taste directly into your beautiful beef.
Keeping and Using Leftovers
If you happen to have a steak left over, don’t let it go to waste. Wrap the cooled steak tightly in aluminum foil or store it in an airtight glass container in the refrigerator for up to three days.
The Gentle Reheating Method
Never put a leftover premium steak into the microwave; it will turn rubbery and gray instantly. Instead, place the steak on a wire rack set inside a baking sheet and warm it in a $250^\circ\text{F}$ oven for about 15 minutes until it is warmed through to the center. For a quick weekday lunch, skip the reheating entirely—cold, thinly sliced strip steak is incredible on top of a crisp green salad or tucked into a sandwich with a smear of horseradish mayonnaise.
Estimated Nutrition per Serving
-
Calories: 380 kcal
-
Protein: 42g
-
Fat: 22g
-
Carbohydrates: 0g
-
Sodium: 450mg (Variable based on seasoning application)
Note: Nutritional values are estimates based on a standard 8-ounce trimmed portion of beef without added butter finish.
Leave a Reply