
The Only St. Louis Spare Ribs Recipe You Need for Your Next Cookout
There is nothing quite like the smell of wood smoke and sweet barbecue drifting across the backyard on a sunny Saturday afternoon. If you have been looking for a foolproof way to make tender, competition-worthy spare ribs without spending the entire day babysitting a temperamental smoker, you are in the right place. This recipe simplifies the process so you can actually enjoy your own party, yielding juicy meat that pulls clean off the bone with just the right amount of chew.
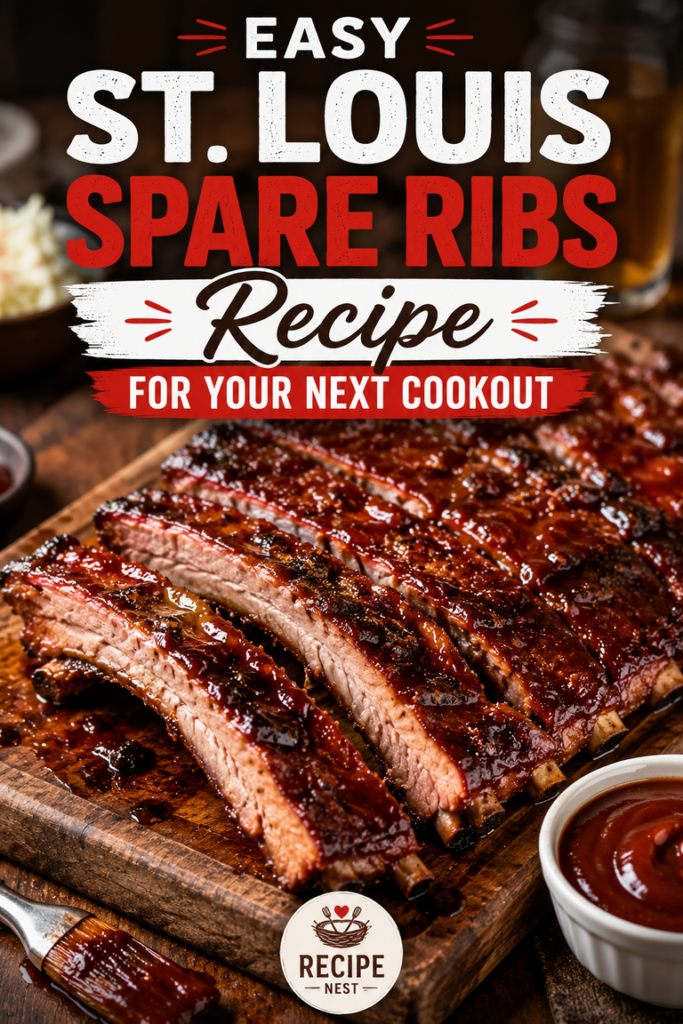
Standard spare ribs can be intimidating because of their size and uneven shape, but switching to the St. Louis cut changes everything. By squaring off the meat, you get a uniform rack that cooks evenly from end to end, ensuring no dry edges or underdone centers. Pin this recipe to your favorite grilling board now, because once your neighbors catch a whiff of these cooking, they will be knocking on your fence asking for the secret.
Why You Will Love This Method
Cooking spare ribs down in the Midwest has taught me that great barbecue does not require expensive, commercial-grade equipment or a secret chemistry degree. You will love this approach because it relies on steady, predictable heat and a simple balance of sweet, savory, and smoky tones.
Unlike baby back ribs, which are leaner and more forgiving of quick cooking, spare ribs carry more marbled fat. This fat melts slowly during the cooking process, naturally basting the meat from the inside out. This means your ribs stay incredibly juicy even if your grill temperature fluctuates a little bit. We use a straightforward three-stage cooking process—often called the 3-2-1 method, though adapted slightly for a thicker cut—which guarantees that perfect texture where the meat holds to the bone until you take a bite.
What You Need: Ingredients
You do not need to hunt down specialty butcher shops for this list. Everything here is readily available at your local supermarket.
-
St. Louis Cut Spare Ribs: Look for a rack that has a thick, even distribution of meat across the bones. Avoid racks with “shiners,” which are spots where the butcher cut too close and exposed the bone. Exposed bones will fall out during cooking and cause the meat to shrink unevenly.
-
Yellow Mustard: This serves strictly as a binder for our dry rub. Don’t worry if you aren’t a fan of mustard; the sharp vinegar flavor completely evaporates during the long cook, leaving behind a beautiful crust.
-
Brown Sugar: This forms the base of the rub, providing that classic caramelization and deep sweetness.
-
Kosher Salt: Coarse salt crystals dissolve more slowly than table salt, drawing moisture into the meat without making it overly salty.
-
Coarse Black Pepper: Standard sixteen-mesh black pepper provides a subtle heat and helps build the textured bark on the outside of the pork.
-
Smoked Paprika: This delivers a beautiful, rich reddish-brown color and introduces a gentle wood-smoke aroma right from the start.
-
Garlic Powder and Onion Powder: These two aromatics lay down a savory foundation that balances out the heavy sugar.
-
Apple Cider Vinegar: Used for spritzing the meat to keep the surface cool and moist, which encourages smoke absorption.
-
Your Favorite Barbecue Sauce: Choose a high-quality sauce that is relatively thick. A tomato-and-molasses-based sauce works beautifully here.
Ingredient Substitutions
Barbecue is an art form born out of using what you have on hand. If your kitchen cabinet looks a little different today, here are some easy swaps that work perfectly without ruining your dinner.
-
The Rub Base: If you run out of brown sugar, dark brown sugar works even better by adding a deeper hint of molasses. In a pinch, white granulated sugar mixed with a tablespoon of maple syrup works fine.
-
The Binder: If yellow mustard is completely out of the question, use a thin coating of olive oil, vegetable oil, or even a splash of pickle juice to help the dry spices adhere to the pork.
-
The Spritz: If you do not have apple cider vinegar, plain apple juice creates a sweeter glaze. A fifty-fifty mix of water and Worcestershire sauce also does wonders for adding a savory, umami-rich depth to the bark.
Essential Kitchen Tools
You do not need a multi-thousand-dollar pellet grill to make incredible spare ribs. A standard kettle charcoal grill, a gas grill with multiple burners, or even a reliable kitchen oven can get the job done, provided you have these foundational tools:
-
Heavy-Duty Aluminum Foil: Regular foil tears far too easily when wrapping metal rib bones. Buy the wide, heavy-duty variety to seal in the juices completely during the braising stage.
-
A Clean Spray Bottle: A simple, food-safe plastic spray bottle is necessary for applying your liquid spritz evenly without washing away your dry rub.
-
A Sharp Boning Knife: Essential for trimming away any loose flaps of fat or small pieces of cartilage before the meat hits the heat.
-
Tongs: Long-handled metal tongs give you the leverage needed to flip a heavy rack without puncturing the meat.
Step-by-Step Instructions
1. Prep the Meat and Remove the Membrane
Lay your rack of spare ribs bone-side up on a large cutting board. You will notice a shiny, paper-like membrane covering the bones, known as the silverskin. If you leave this on, it acts as a barrier, preventing your rub from penetrating the meat and turning into a tough, leathery strip when cooked.
To remove it, slip a dull butter knife under the membrane over the middle bone. Lift up gently until you can get your fingers under it. Grab a piece of paper towel for a firm grip, and pull the membrane off in one smooth motion. It might rip the first few times you try it, but stick with it—removing it makes a massive difference in how tender the final product turns out. Trim away any loose, hanging chunks of fat from the edges so the rack has a clean, uniform shape.
2. Apply the Binder and the Dry Rub
Mix your brown sugar, kosher salt, black pepper, smoked paprika, garlic powder, and onion powder in a small bowl until completely uniform. Squirt a tablespoon of yellow mustard onto the bone side of the ribs and spread it into a thin layer with your hands.
Sprinkle your rub generously from about a foot above the meat; this height ensures an even distribution without clumping. Let the meat sit at room temperature for about fifteen minutes. You will see the rub start to look wet as the salt draws out the natural juices of the pork. Flip the rack over and repeat the process on the meatier side.
3. Set Up for Indirect Heat
Preheat your grill or smoker to a steady 225°F (107°C). If you are using a charcoal grill, pile your lit coals entirely on one side, leaving the other side completely empty. Place a small aluminum pan filled with water directly beneath the empty side to help regulate the temperature and add moisture to the air.
Place your seasoned spare ribs skin-side up on the cool, indirect side of the grill, away from the live coals. Close the lid with the vents partially open, positioning the top vent directly over the ribs to draw the smoke across the meat.
4. Smoke and Spritz
Let the ribs cook undisturbed for the first ninety minutes. After that, open the lid and check the surface. If it looks dry, give the rack a generous spritzing with your apple cider vinegar. Repeat this spritz every forty-five minutes.
During this initial three-hour phase, the heat slowly cooks the pork while the smoke binds to the damp surface, building a deep, mahogany-colored bark. You will know it is time to move to the next step when the meat begins to gently pull back from the tips of the bones, exposing about a quarter-inch of bare metal.
5. The Foil Wrap (The Braise Phase)
Tear off a piece of heavy-duty aluminum foil that is twice the length of your rib rack. Lay it flat on a table and scatter a few small pats of butter and a tablespoon of brown sugar across the center. Lay the ribs face-down onto the butter and sugar.
Pour two tablespoons of your apple cider vinegar into the foil packet, then fold the edges up tightly. You want an airtight seal so the moisture cannot escape. Put the wrapped bundle back onto the indirect side of the grill for another two hours. This step steams the meat, breaking down the tough connective tissues inside the spare ribs until they are perfectly tender.
6. Glaze and Finish
Carefully open the foil packet—watch out for the hot steam—and lift the ribs back onto the grates, bone-side down. The meat will be fragile at this point, so move slowly.
Use a silicone brush to apply a thin coat of barbecue sauce over the top of the rack. Close the lid and let the ribs cook for another twenty to thirty minutes. This final blast of dry heat tightens up the bark and caramelizes the sugars in the barbecue sauce, creating a sticky, glossy lacquer that clings beautifully to the pork.
Expert Tips for Perfect Ribs
-
Trust the Bend Test: Do not rely solely on a meat thermometer, as hitting a bone will give you a false reading. Instead, pick up the rack from one end with your tongs. If the rack bends easily and the meat starts to crack slightly across the center, your spare ribs are done.
-
Give It a Rest: Resist the urge to slice into the rack the second it comes off the grill. Let the ribs rest on a warm cutting board for ten minutes. This allows the internal juices to redistribute throughout the meat, keeping every single bite moist.
-
Keep the Temperature Low: High heat turns pork fat into a rubbery mess and burns the sugar in your rub. A steady, low temperature is the absolute secret to melting the fat down into the meat properly.
Common Mistakes to Avoid
-
Boiling the Ribs First: Some old recipes suggest boiling spare ribs before grilling them to speed up the process. Please skip this. Boiling leaches all the natural pork flavor directly into the water, leaving you with bland, watery meat.
-
Saucing Too Early: Applying barbecue sauce at the beginning of the cook is a guaranteed way to burn your dinner. The high sugar content in commercial sauces burns quickly over direct heat. Keep the sauce in the refrigerator until the final thirty minutes of cooking.
-
Over-Wrapping: When you wrap the ribs in foil, make sure it is pulled tight against the meat. If the wrap is loose, the ribs will pool in liquid and boil rather than braise, turning the meat mushy instead of tender.
Storage and Reheating
If you somehow end up with leftovers, wrap the cooled sections tightly in plastic wrap or aluminum foil, then store them in an airtight container in the refrigerator for up to four days.
To reheat them without drying out the meat, place the ribs in a baking dish, add a splash of water or apple juice to the bottom, and cover the entire dish tightly with foil. Bake at 250°F (121°C) for about twenty minutes until the meat is warmed through, then brush on a fresh layer of barbecue sauce before serving.
Estimated Nutrition Information
Serving Size: 3 bones (Calculated per individual serving based on standard ingredient variations)
| Nutrient | Amount Per Serving |
| Calories | 480 kcal |
| Total Fat | 32g |
| Saturated Fat | 11g |
| Cholesterol | 120mg |
| Sodium | 840mg |
| Total Carbohydrates | 18g |
| Dietary Fiber | 1g |
| Sugars | 15g |
| Protein | 29g |
(Note: Nutritional values are estimates and will vary based on the specific brand of barbecue sauce and the exact trim of your spare ribs.)
Leave a Reply