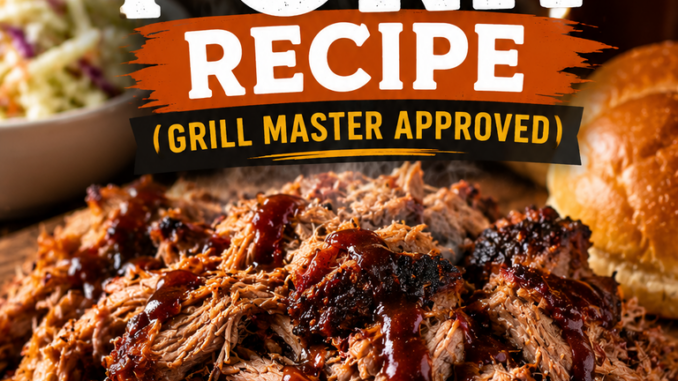
There’s something satisfying about lifting the lid on a smoker after several hours and finding a beautifully browned pork shoulder with a deep mahogany bark. The aroma alone is enough to draw everyone into the backyard asking the same question: “How much longer until we eat?” I’ve cooked pulled pork for neighborhood cookouts, holiday weekends, and game-day gatherings, and it never lasts long once it’s shredded.
Good pulled pork isn’t difficult, but it does reward patience. Low heat gives the fat time to render, the connective tissue time to break down, and the meat time to become so tender that it practically falls apart. Once you understand the process, you’ll make pulled pork that friends and family request again and again.

Why You’ll Love This Recipe
- Tender, juicy pork that shreds effortlessly.
- A rich smoky flavor with a perfectly seasoned bark.
- Great for sandwiches, tacos, sliders, nachos, and baked potatoes.
- Easy to prepare ahead for parties and family gatherings.
- Makes fantastic leftovers that taste just as good the next day.
- Uses simple ingredients you can find at almost any grocery store.
Ingredients
For the Pulled Pork
- 1 bone-in pork shoulder (Boston butt), 8–10 pounds
- 2 tablespoons yellow mustard (optional binder)
- 3 tablespoons brown sugar
- 2 tablespoons kosher salt
- 2 tablespoons coarse black pepper
- 1 tablespoon smoked paprika
- 2 teaspoons garlic powder
- 2 teaspoons onion powder
- 1 teaspoon chili powder
- 1 teaspoon ground cumin
- ½ teaspoon cayenne pepper (optional)
For Spritzing
- Apple juice
- Apple cider vinegar
For Serving
- Barbecue sauce
- Brioche buns
- Coleslaw
- Pickles
Ingredient Substitutions
One thing I appreciate about pulled pork is how forgiving it can be. If you’re missing an ingredient, you usually don’t have to abandon the recipe.
- No brown sugar? Light or dark brown sugar both work well.
- Sea salt can replace kosher salt if that’s what you have.
- Paprika works if smoked paprika isn’t available, though you’ll lose a little smoky depth.
- Honey can replace brown sugar for a slightly sweeter bark.
- If you don’t have apple juice, use beef or chicken broth for spritzing.
Don’t worry if your spice cabinet isn’t perfectly stocked. The pork and smoke provide most of the flavor.
Equipment Needed
- Smoker, pellet grill, or charcoal grill set up for indirect cooking
- Meat thermometer
- Instant-read thermometer
- Heavy-duty aluminum foil or butcher paper
- Spray bottle
- Large disposable aluminum pan (optional)
- Heat-resistant gloves
- Two large forks or meat claws for shredding
If there’s one tool I wouldn’t skip, it’s a reliable thermometer. Cooking by time alone is the quickest way to end up with dry or tough pork.
Before You Start Cooking
Trim Only What You Need To
Unlike brisket, pork shoulder benefits from keeping much of its fat cap intact.
I usually trim off only thick or uneven sections. As the pork cooks, much of that fat slowly renders and helps keep the meat moist.
Season Every Side
Pork shoulder is a thick cut, so don’t be shy with the seasoning.
Press the rub gently into the meat instead of rubbing it aggressively. This helps it stay in place once the cooking begins.
Let the Rub Rest
If you have an extra hour—or even overnight—season the pork ahead of time.
The spices begin drawing a little moisture to the surface, creating a tacky coating that helps smoke cling to the meat and encourages a flavorful bark.
Step-by-Step Instructions
Step 1: Prepare the Smoker
Preheat your smoker to 225°F.
Oak is my favorite wood for pulled pork because it gives a balanced smoke that complements the pork without overwhelming it. Hickory is another excellent choice if you enjoy a stronger barbecue flavor, while apple wood produces a slightly sweeter finish.
Wait until the smoke turns thin and light before adding the pork. Thick white smoke can leave the meat with a bitter taste.
Step 2: Season the Pork
Pat the pork shoulder dry with paper towels.
If you’re using mustard as a binder, spread a thin layer over the surface. It won’t make the pork taste like mustard—it simply helps the seasoning stick.
Coat every side generously with the spice rub.
Because pork shoulder is such a large cut, it can handle more seasoning than you might expect.
Step 3: Smoke Low and Slow
Place the pork shoulder on the smoker with the fat cap positioned according to your smoker’s heat source.
Close the lid and let the smoker do its work.
One mistake I made when I first started smoking meat was opening the lid every thirty minutes just to check on things. Every peek lets heat escape and extends the cooking time.
Now I trust my thermometer and leave the lid closed unless I actually need to spritz or check the temperature.
Step 4: Spritz During the Cook
After about three hours, lightly spritz the pork every 45 to 60 minutes with apple juice or a mixture of apple juice and apple cider vinegar.
You don’t need to soak it.
A light mist is enough to help the bark develop without washing away the seasoning.
Step 5: Wrap During the Stall
Somewhere around 160–170°F, the pork will seem to stop cooking.
Don’t panic.
This is completely normal and is known as “the stall.”
Wrap the pork tightly in butcher paper if you want a firmer bark, or use aluminum foil if your priority is keeping every bit of moisture inside.
I’ve used both methods over the years, and honestly, they both produce excellent pulled pork. If I’m cooking for a crowd, I usually reach for foil because it’s dependable and helps speed things along.
Step 6: Cook Until Tender
Continue cooking until the internal temperature reaches 200–205°F, but don’t rely on the thermometer alone.
The real test is tenderness.
Insert your probe into several spots. It should slide in with almost no resistance, almost like pushing it into softened butter.
If it still feels tight, give the pork another twenty or thirty minutes and check again.
That’s often the difference between pulled pork that’s merely good and pulled pork that practically falls apart with almost no effort.
Step 7: Rest Before Shredding
Once the pork reaches the right tenderness, remove it from the smoker and let it rest for at least one hour.
I know it’s tempting to pull it apart right away. The smell alone makes waiting feel impossible. But resting gives the juices time to settle back into the meat instead of running all over your cutting board.
Keep the pork wrapped and place it in an empty cooler or an unheated oven to help it stay warm while it rests.
Step 8: Shred the Pork
Put on a pair of heat-resistant gloves or use two large forks.
Remove the shoulder blade first. If the pork is done, the bone should slide out clean with almost no effort.
Shred the meat into bite-sized pieces, mixing the flavorful bark throughout. Those darker pieces add texture and smoky flavor to every serving.
Pour some of the collected juices back over the shredded pork and toss gently.
Skip the barbecue sauce for now. Let everyone add their own at the table so the smoky flavor of the pork still shines through.
Expert Tips
Start With a Bone-In Pork Shoulder
Boneless pork shoulder works, but I almost always choose bone-in.
The bone helps the meat cook more evenly, and it’s one of the easiest ways to check for doneness. When it pulls out cleanly, you’re usually in great shape.
Give Yourself More Time Than You Think You’ll Need
Pulled pork has its own schedule.
I’ve had nearly identical pork shoulders finish two hours apart.
If dinner is at 6:00 p.m., I plan to have the pork finished by 3:30 or 4:00 p.m. That extra time removes all the stress, and the pork stays hot surprisingly well while resting.
Save Every Drop of Juice
After unwrapping the pork, don’t throw away the liquid in the foil or butcher paper.
That smoky, flavorful juice is liquid gold.
Mix it back into the shredded pork a little at a time until the meat is moist but not swimming in liquid.
Taste Before Adding Sauce
A well-cooked pulled pork doesn’t need to be drenched in barbecue sauce.
I usually serve the sauce on the side because everyone has their own favorite style. Some like sweet, others like vinegar-based sauces, and some prefer the pork exactly as it came off the smoker.
Common Mistakes to Avoid
Cooking Until the Temperature Looks Right Instead of the Meat Feeling Right
Internal temperature gets you close, but tenderness is what matters.
If the probe still meets resistance, keep cooking.
Using Too Much Smoke
More smoke doesn’t always mean better barbecue.
Thin blue smoke produces a cleaner flavor than thick white smoke, which can leave the pork tasting bitter.
Shredding Too Early
Resting isn’t optional.
Cutting into the pork immediately after cooking lets valuable juices escape, and the finished meat won’t be nearly as moist.
Removing All the Fat
Some larger pieces of fat should be discarded after shredding, but don’t trim away every bit before cooking.
Rendered fat is one of the reasons pulled pork stays juicy through a long cook.
Storage
Store leftover pulled pork in an airtight container along with some of its cooking juices.
It will keep in the refrigerator for up to 4 days.
For longer storage, freeze it in portion-sized freezer bags for up to 3 months.
Removing as much air as possible helps prevent freezer burn.
Reheating
The oven is my favorite way to reheat pulled pork.
Place the pork in a baking dish with a splash of the reserved juices or a little chicken broth.
Cover tightly with foil and warm at 300°F until heated through.
For smaller portions, a skillet over low heat works well too. Add a spoonful of broth and stir occasionally to keep the meat moist.
Frequently Asked Questions
What’s the best cut of pork for pulled pork?
Bone-in pork shoulder, often labeled as Boston butt, is the best choice because it has enough fat and connective tissue to become tender during a long cook.
How long does pulled pork take to cook?
An 8 to 10-pound pork shoulder usually takes 10 to 14 hours at 225°F, plus at least one hour of resting time.
Always cook until tender rather than watching the clock.
Can I make pulled pork in advance?
Absolutely.
In fact, I think pulled pork often tastes even better the next day after the flavors have had time to settle together.
Should I use butcher paper or foil?
Both work well.
I choose butcher paper when I want a slightly firmer bark.
Foil traps more moisture and can shorten the cooking time a little.
Neither is wrong—it simply depends on the result you’re after.
Estimated Nutrition Information
Per serving (approximate)
- Calories: 410
- Protein: 35g
- Fat: 27g
- Saturated Fat: 9g
- Carbohydrates: 5g
- Fiber: 1g
- Sugar: 3g
- Sodium: 620mg
Nutrition values are estimates and will vary depending on ingredients and portion size.
Recipe Card
Grill Master Approved Pulled Pork
Prep Time: 20 minutes
Cook Time: 10–14 hours
Rest Time: 1 hour
Total Time: Approximately 12–15 hours
Servings: 12–16
Ingredients
- 1 bone-in pork shoulder (8–10 pounds)
- Yellow mustard (optional)
- Brown sugar
- Kosher salt
- Black pepper
- Smoked paprika
- Garlic powder
- Onion powder
- Chili powder
- Ground cumin
- Apple juice
- Apple cider vinegar
Instructions
- Preheat smoker to 225°F.
- Trim excess fat and season generously.
- Smoke until the internal temperature reaches 160–170°F.
- Spritz every 45–60 minutes after the first few hours.
- Wrap in butcher paper or foil.
- Continue cooking until probe tender, about 200–205°F.
- Rest for at least one hour.
- Shred, mix with reserved juices, and serve.
Serving Ideas
Pulled pork is one of those meals that can stretch into several completely different dinners.
Try serving it with:
- Soft brioche buns and creamy coleslaw
- Macaroni and cheese
- Southern baked beans
- Cornbread
- Smoked baked potatoes
- Loaded nachos
- Street tacos with fresh pico de gallo
- Rice bowls with grilled vegetables
- Hawaiian rolls for party sliders
Leave a Reply